


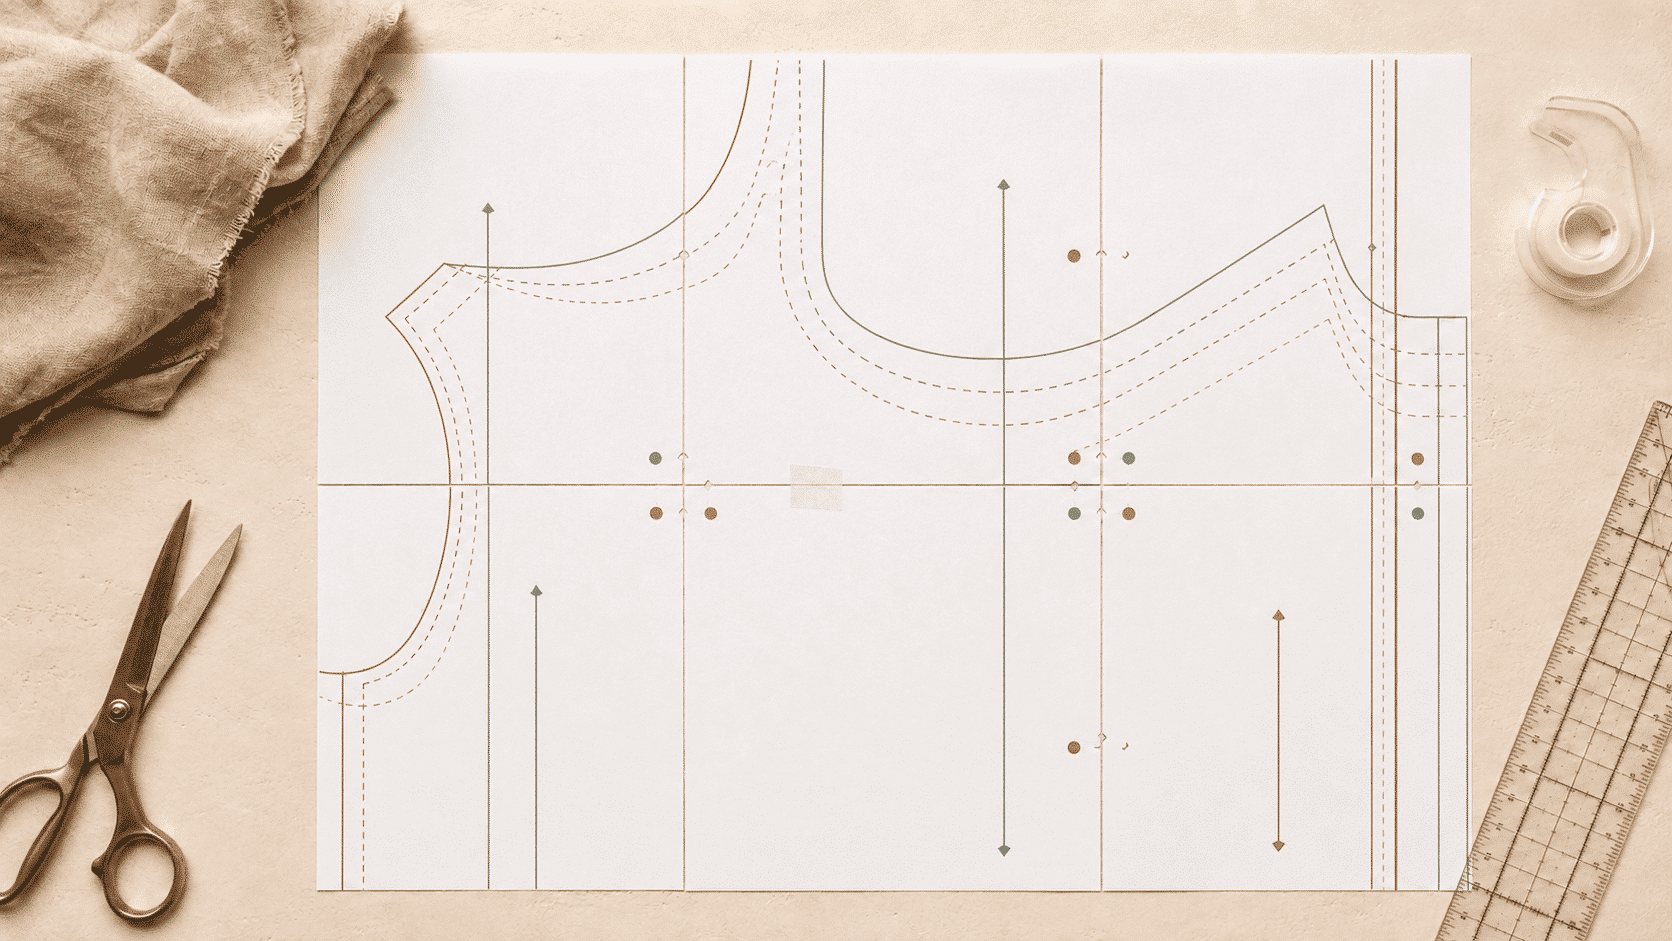
How to Print & Assemble PDF Sewing Patterns (A4 & US Letter)
You just bought a PDF sewing pattern, you open the file, and instead of one big sheet you find 30, 40, sometimes 60 pages to assemble. Don’t panic — this is completely normal, and assembling them takes about 20 minutes once you know the routine.
This guide walks you through the whole process for A4 and US Letter paper, including the one check that saves people the most heartbreak: the test square.
What You’ll Need
- The pattern PDF, from your download folder or your account
- A4 or US Letter paper — check the page count in the PDF first so you don’t run out mid-print
- A colour printer — colour is required, see Step 3
- Paper scissors or a rotary cutter — not your fabric scissors
- Sticky tape or a glue stick
- A ruler
- A clear floor or a large table
Step 1: Open the PDF in a Real PDF Reader
Open the file in Adobe Acrobat Reader or a similar dedicated PDF reader — not in your web browser’s built-in preview. Browsers and phone apps love to resize pages silently, which is exactly what ruins the scale of a sewing pattern.
While you’re there, check how many pages the pattern needs for your paper format, so you can load enough paper before you start.
Step 2: Print the Test Square First
Never skip this step. One sheet of paper now saves you 40 pages of a garment that comes out two sizes off.
Somewhere in the file there is a test square measuring 5 cm / 1.96″. It’s usually on the first page, but not always — sometimes it sits on another page, or is split across two. Scroll through, find it, and note the page number.
Print that page only, then measure the square with a ruler:
- Exactly 5 cm / 1.96″ → your settings are correct, print the rest.
- Too big or too small → fix your settings and print the test page again.
Step 3: Use the Right Print Settings
| Setting | A4 | US Letter |
|---|---|---|
| Paper size | A4 | US Letter |
| Scale | 100% | 100% or Actual size |
| Margins | Default | Default |
| Colour | Required | Required |
You must print in colour. The assembly numbers and the pattern markings are colour-coded, and in black and white they become impossible to tell apart. If your printer is out of colour ink, print at a copy shop instead — it costs a few euros and saves you assembling the whole thing twice.
If your printer won’t give a correct square at 100%: some printers and drivers simply refuse to cooperate. Print two consecutive pages at a slightly different scale, check the alignment markings line up, and measure the square again. Once you find the scale that gives an exact 5 cm / 1.96″ square, use it for the whole pattern.
Step 4: Fold the Sheets — It’s Easier Than Cutting
Print everything and keep the pages in order.
Each page has dotted lines running along its edges. You can cut along them with paper scissors — but there’s a faster way we recommend to all our customers: just fold along the dotted line, taking the margin to the back of the sheet.
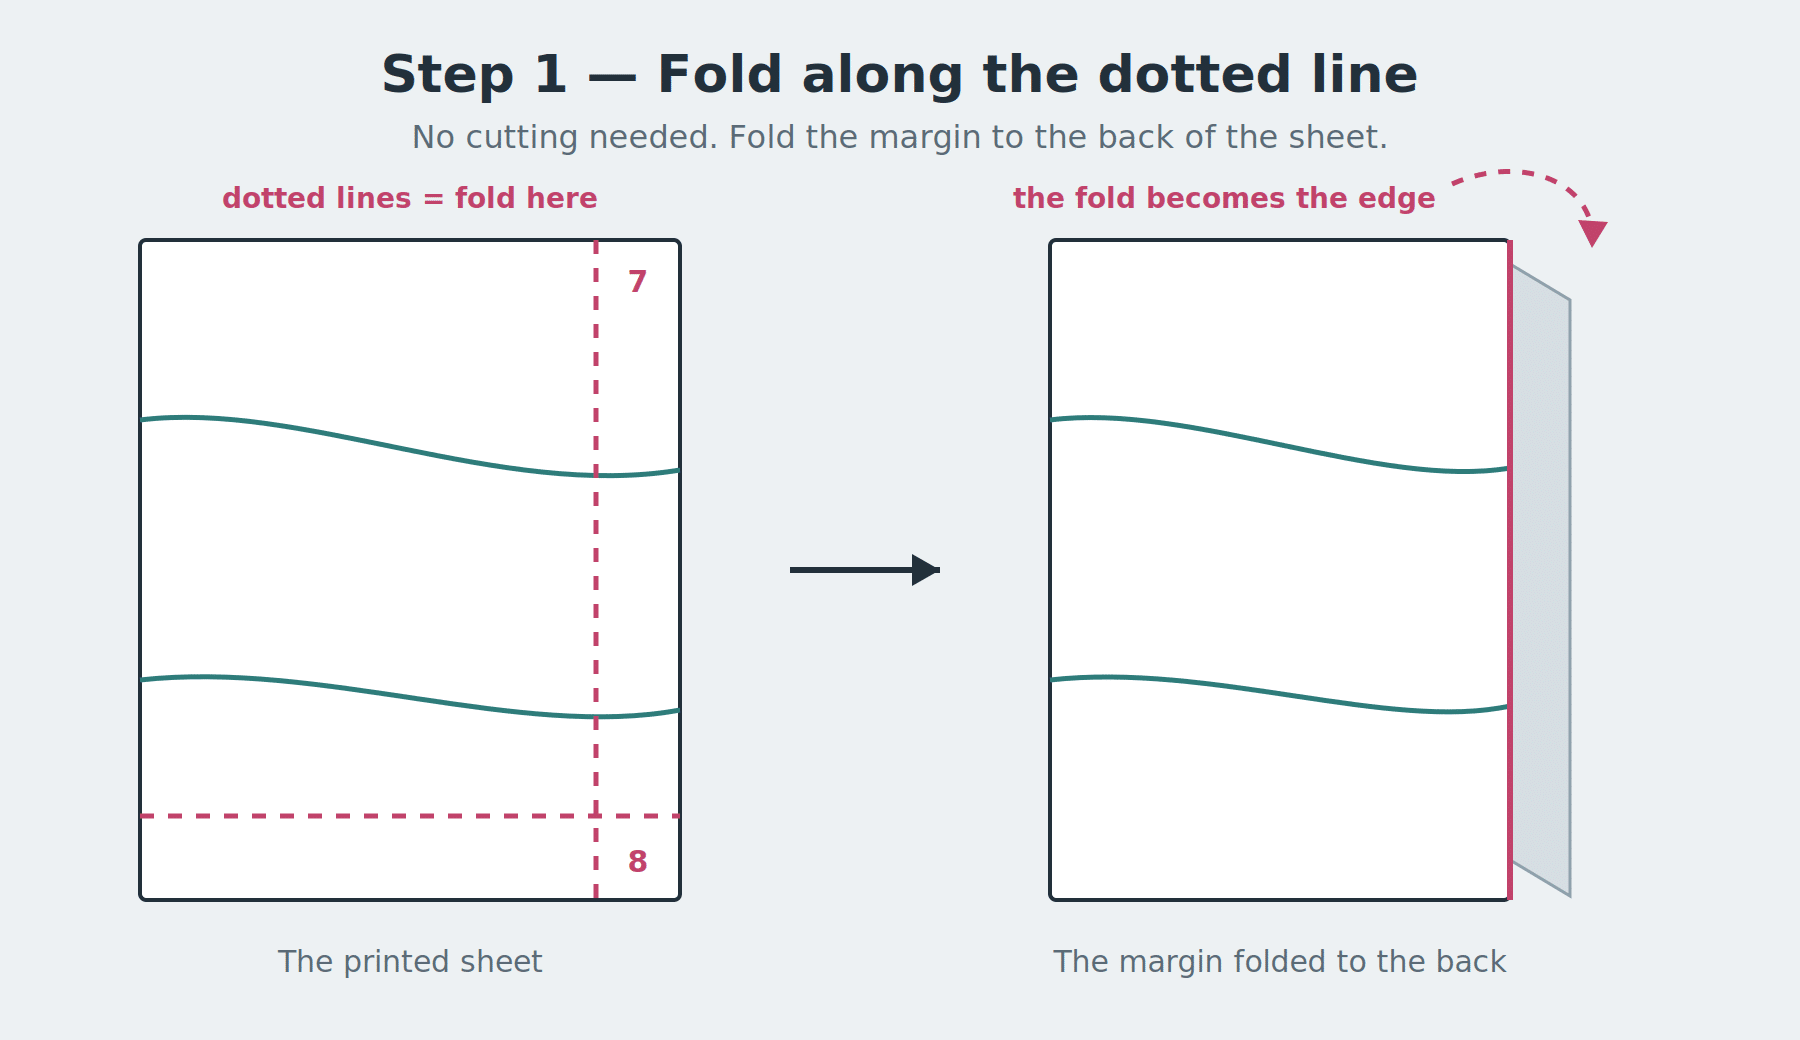
Folding beats cutting for three reasons: it’s quicker, the crease gives you a crisp edge to align against, and if a sheet ends up in the wrong place you can simply unfold it and start again. Nothing is lost.
You normally only need to fold two sides of each sheet — the ones that will sit on top of the neighbouring pages. And if you do prefer to cut, use paper scissors: paper blunts fabric shears astonishingly quickly.
Step 5: Join the Sheets Together
The golden rule: whatever your paper format, the folded sheet goes on top, and its folded edge sits exactly on the dotted line of the sheet underneath.
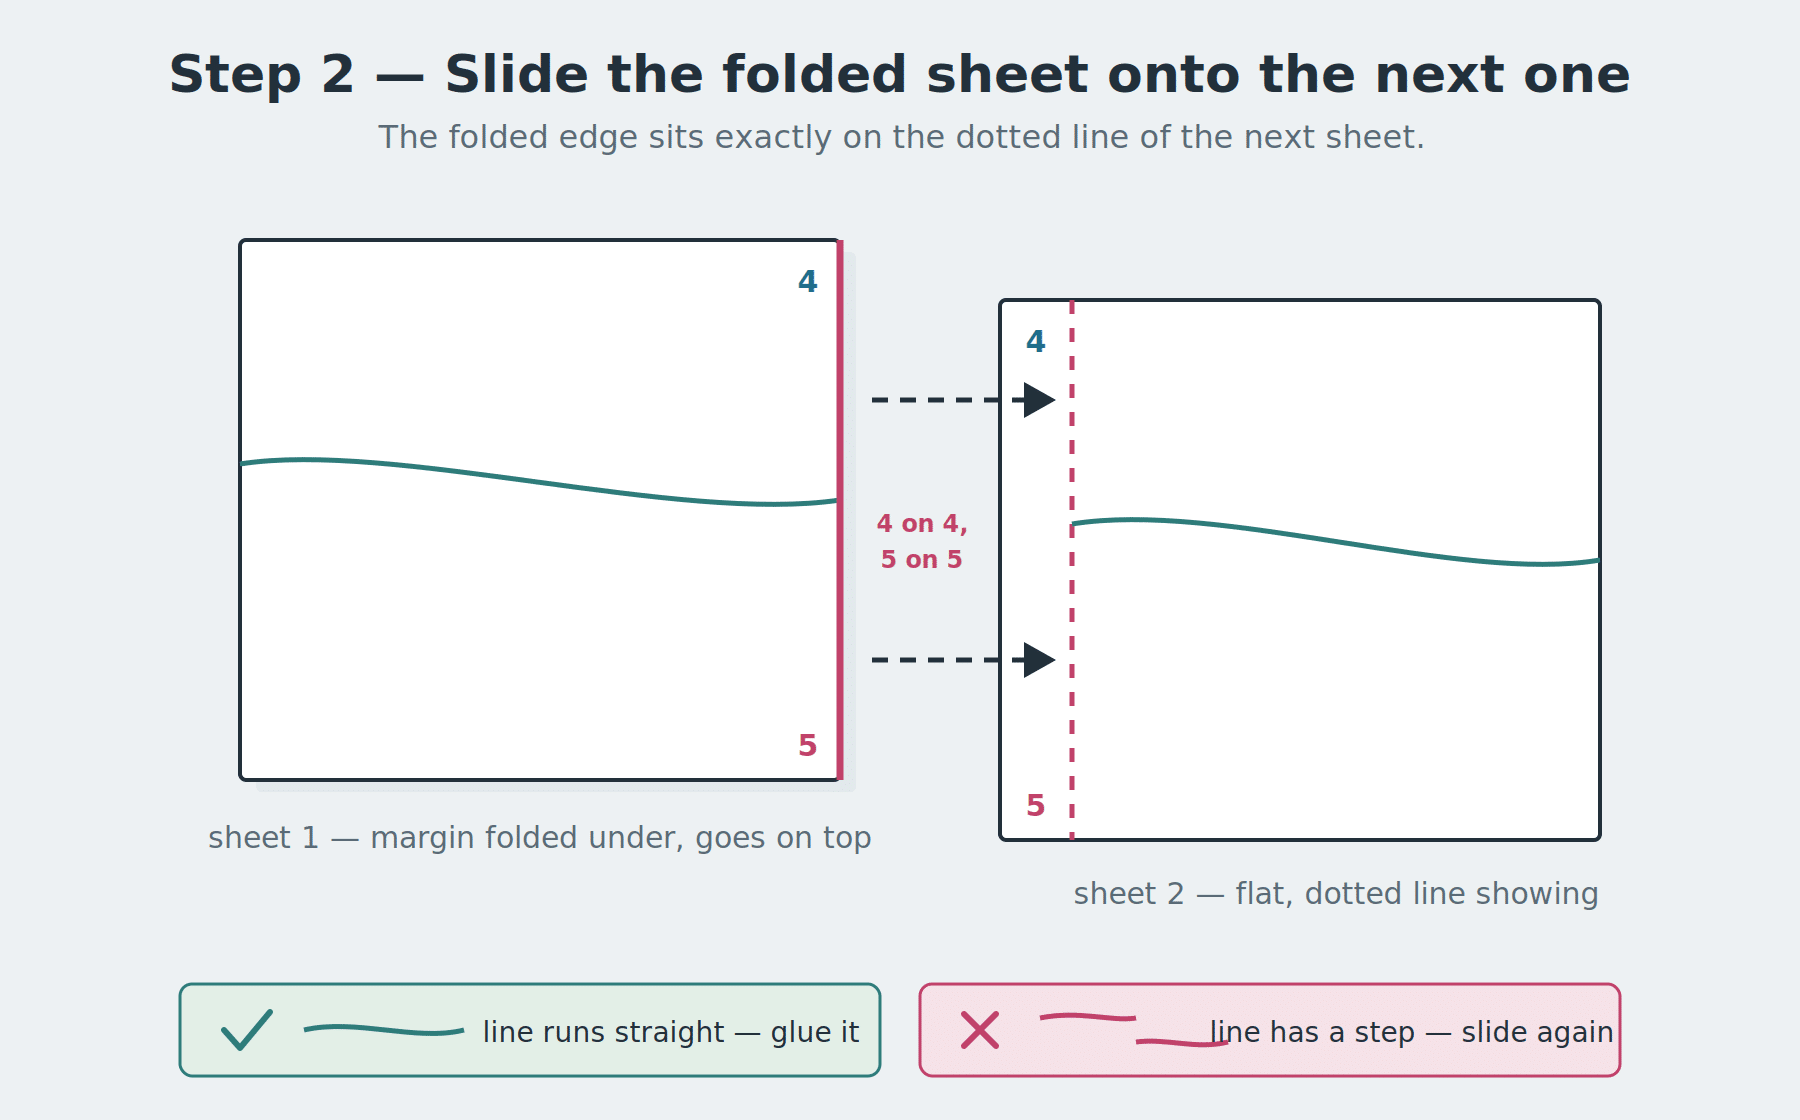
Slide the top sheet until the printed lines run straight across the join, with no step in them, then tape or glue. If a line jumps at the join, the sheets are misaligned — lift and slide again before you stick anything down.
Now look at the markings printed on your pages. There are two systems, and one glance at the PDF tells you which one you have.
System 1 — Matching Numbers in the Corners
Used on all our current patterns.
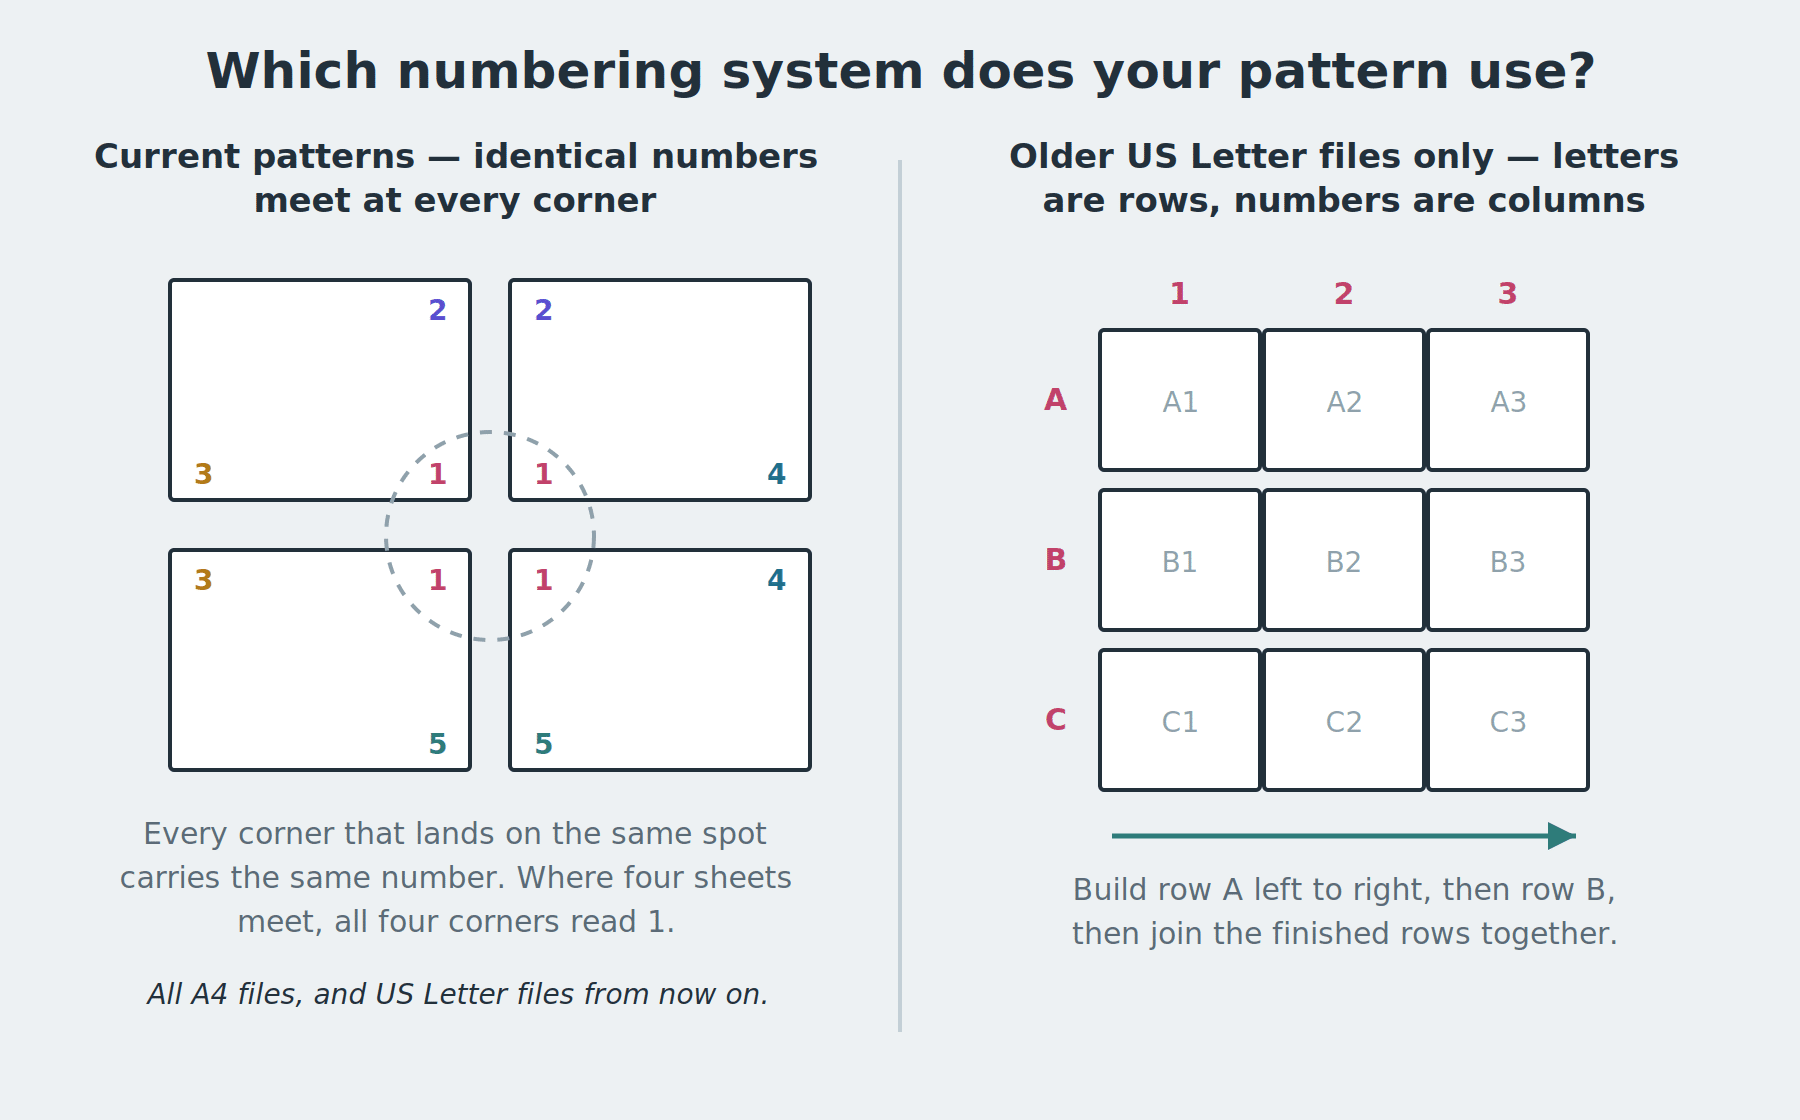
On our current files, the number marks a meeting point, not a sheet. Every corner that lands on the same spot carries the same number, so assembling is simply a matter of putting identical numbers on top of each other: 4 on 4, 5 on 5.
Where two sheets meet along an edge, two corners share a number. Where four sheets come together, all four corners read the same number — if you see a 1, the three neighbouring corners must be 1 as well. A 1 sitting next to a 2 means that sheet is in the wrong place.
This is how every A4 file has always worked, and our US Letter files now use it too, so the method is identical whichever paper you choose:
- Lay the sheets out on the floor, following the layout map shown in the PDF.
- Work through the numbers in order, folding each sheet and laying it over its neighbour.
- Line up the identical numbers, check the printed lines run straight across the join, then glue or tape.
This is exactly why the pattern has to be printed in colour: each number carries its own colour, so you can see at a glance whether the corners meeting at a point belong together, instead of squinting at identical black numbers across 40 sheets.
System 2 — Letters and Numbers
Older US Letter files only.
If your pages are marked A1, A2, A3, B1, B2…, you have one of our earlier US Letter files. A4 files have never used this system, so if you’re printing on A4 you can skip straight past this section.
The letter-and-number system is a grid: the letters are the rows and the numbers are the columns. Assemble row by row — complete row A from left to right, then row B, then join row B underneath row A. Working in rows is much easier than trying to build the whole grid at once.
Either Way
- Check the printed lines run continuously across the join before you tape. A step in a line means the sheets are misaligned.
- Tape on both sides if you want a pattern you can reuse.
- A glue stick gives a flatter result; tape is faster and more forgiving.
Step 6: Final Check, Then Cut It Out
Good news: each of our PDFs contains one single size. There are no nested size lines to untangle and nothing to trace — the pattern in front of you is already yours, so you can cut straight along the line.
Before you cut anything out:
- Measure the test square one last time on the assembled pattern.
- Double-check you printed the file for the size you want — one PDF, one size, so it’s worth a quick look at the file name before you get out the scissors.
- Note that the inner line is the pattern without seam allowance, and the outer line includes the seam allowance. Choose the one that matches how you like to sew.
- Cut along that line — or trace it onto pattern paper if you’d rather keep the assembled sheets intact for next time.
Then check the pattern piece list, the grainline arrows, and any “cut on fold” or “mirror” markings before you go near your fabric.
Not Sure Home Printing Is Worth It?
A0 format
Take the A0 file to a local copy shop and get one single large sheet. No taping at all — the most popular option for coats and dresses.
A3 format
Half the pages of A4, same assembly process. Just ask and we’ll create it for you.
Plotter printing
If your local print shop needs a specific size, just ask us for the corresponding file.
Projector files
If you use a projector over your cutting table, ask us for a projector PDF and skip paper entirely.
Frequently Asked Questions
My test square is 4.8 cm instead of 5 cm. What went wrong?
Almost always a scaling setting. Check that “Fit to page”, “Shrink oversized pages” and “Fit to printable area” are all switched off, and that scale is set to 100% or Actual size.
Can I print an A4 pattern on US Letter paper?
Not reliably. US Letter is shorter and wider than A4, so the pages won’t line up. Use the file that matches your paper.
Do I have to print in colour?
Yes. The assembly numbers and the pattern markings rely on colour to be readable, so a black and white print will leave you unable to tell them apart. If you don’t have a colour printer, a copy shop or your local library will do it for very little.
My US Letter pages are marked A1, A2, A3 — is that different?
That means you have one of our earlier US Letter files, where letters are the rows and numbers are the columns. Our current patterns — A4 and US Letter alike — use matching corner numbers instead. Both methods are explained in Step 5 above.
Should I cut the sheets or fold them?
Fold them. It’s faster than cutting, gives you a crisp edge to line up against, and can be undone if a sheet ends up in the wrong position.
Can I print at the library or a copy shop?
Yes, and it’s a good solution if you don’t have a colour printer. Just make sure they print in colour at 100% scale, and take the test-square page with you to check before they run the whole job.
How long does assembly take?
Around 15 to 30 minutes for a typical garment pattern, once you’ve done it a couple of times.
Does the PDF contain every size?
No — each PDF holds a single size, which is why the pages assemble into one clean pattern with no overlapping size lines. Make sure you download the file matching your measurements, and get in touch if you’re between sizes.
Ready to Print Your Next Pattern?
Now that assembly holds no mystery, all that’s left is choosing what to sew. Every one of our patterns comes with A4, US Letter and A0 files included — and A3, plotter or projector versions on request, at no extra cost.
Still stuck? Send us a message — we’ll walk you through it. And if this guide helped, pin it for later and share it with your sewing friends!