How to sew silk without it sliding away from you
Difficult fabrics · Complete guide
How to sew silk without slipping, puckering or fraying
Silk moves while you cut it, shows every needle mark and can change under a drop of water. None of that makes it impossible to sew. It simply means the fabric needs a slower, more deliberate method.

Silk has a reputation for being unforgiving, and there is some truth in it: it records pin holes, escapes from under scissors and makes rushed stitching very obvious. But most problems begin before the fabric ever reaches the machine. Choose the right silk, stabilise it while cutting and test every setting on a scrap, and the whole process becomes far more predictable.
▼ Before you start
Choose the silk, not just the colour
Silk is a fibre, not a single type of fabric. A crisp dupioni and a floating chiffon may both be silk, but they behave completely differently. The most useful clue is drape: as a general rule, the more fluidly the fabric falls, the more carefully it needs to be handled.
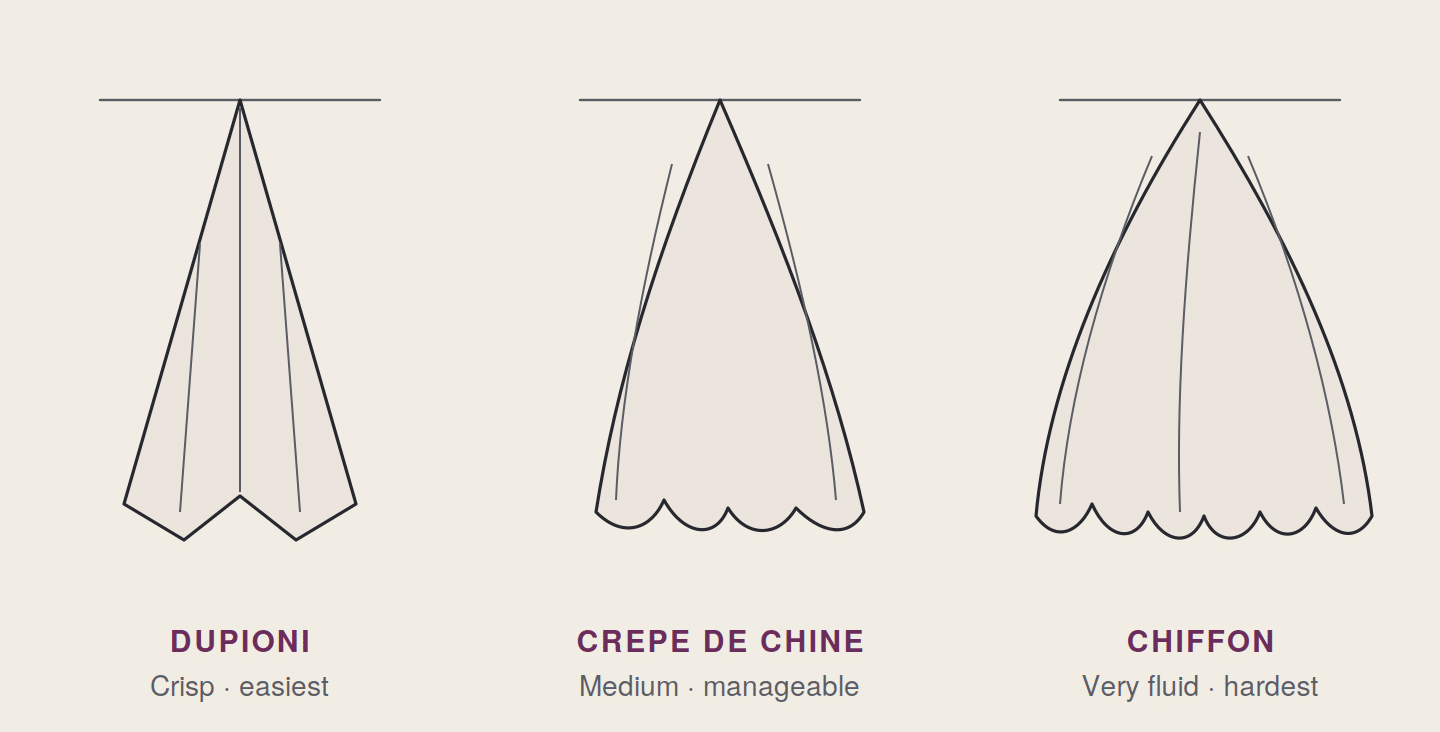
FIGURE 1 — DRAPE CHANGES THE DIFFICULTY
A fabric that forms many soft folds will usually move more on the cutting table and under the presser foot. Compare fabrics by hanging them over the same support in the same light.
The easiest silks to begin with
- Silk noil. Matte and slightly textured, with an almost cotton-like grip. It is stable to cut and press.
- Dupioni or shantung. Crisp and structured, so it stays where you place it. It does fray and crease easily, so finish the edges promptly.
A manageable next step
- Habotai. Light, smooth and often slippery. A slightly heavier habotai is easier than a very fine lining weight.
- Crepe de chine. Fluid, but its lightly textured surface gives more control than satin.
- Charmeuse or silk satin. Beautifully fluid and glossy, but quick to slide and easy to mark.
Save these for later
- Chiffon and georgette. Sheer, light and mobile. They are possible to sew well, but they demand more patience at every stage.
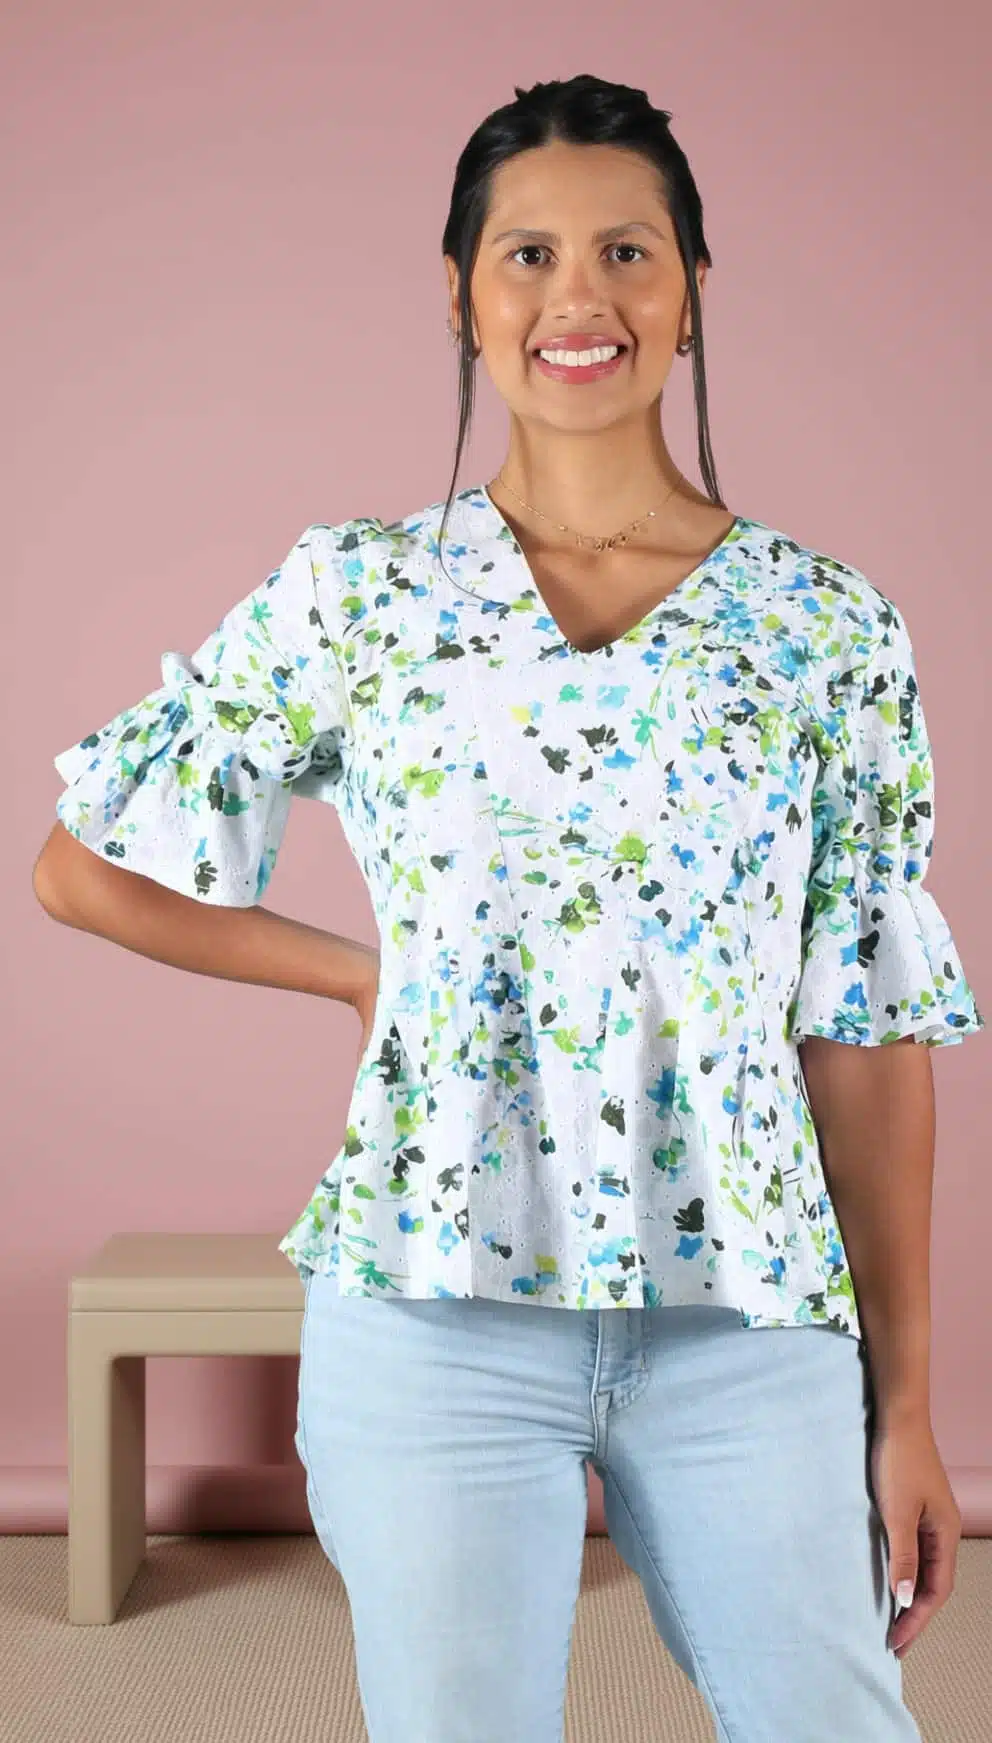
A good first silk projectThe BALI Camisole is a beginner-friendly pattern with a relaxed, tiered construction. It works in lightweight silk and satin, while the gathers and elasticated neckline avoid complicated closures. Make a first version in cotton voile or viscose if you want to practise the construction before cutting into silk.
▼ Step 1
Prewash—or choose not to, deliberately
Before doing anything, check the supplier’s care instructions. If the finished garment will be washed at home, prewash the fabric using the same method. Otherwise, the first wash may shrink the garment or change its surface.
For washable silk: use cool or lukewarm water and a small amount of detergent formulated for wool and silk. Avoid enzyme detergents and fabric softener. Do not wring the fabric; press it gently between clean towels and dry it flat, away from direct sunlight.
Washing can change the hand and finish. Charmeuse may become softer and less glossy, while some textured silks become more relaxed. That may be exactly the result you want—but it should never be a surprise.
Golden ruleWash and press a 10 × 10 cm sample first. Check it only when completely dry, then compare it with the unwashed fabric.
If preserving the original finish matters more than home washing—often the case with dupioni, special-occasion fabrics or embellished silk—keep the fabric unwashed and plan for professional cleaning.
▼ Step 2
Take control at the cutting table
Accurate sewing cannot rescue inaccurate cutting. Give the fabric a large, clean surface and let it rest flat before you align the grainline.
Cut in a single layer
A folded layer can shift underneath while the top layer appears perfectly straight. Trace full pattern pieces for anything normally cut on the fold. For mirrored pieces, turn the pattern over for the second piece and mark the wrong side clearly.
Place sacrificial paper underneath
Lay tissue paper or thin pattern paper on the table, then place the silk and pattern pieces on top. The paper gives the fabric grip and can be cut along with it. If you prefer not to cut through paper, cover the table with a clean cotton sheet to create a less slippery surface.
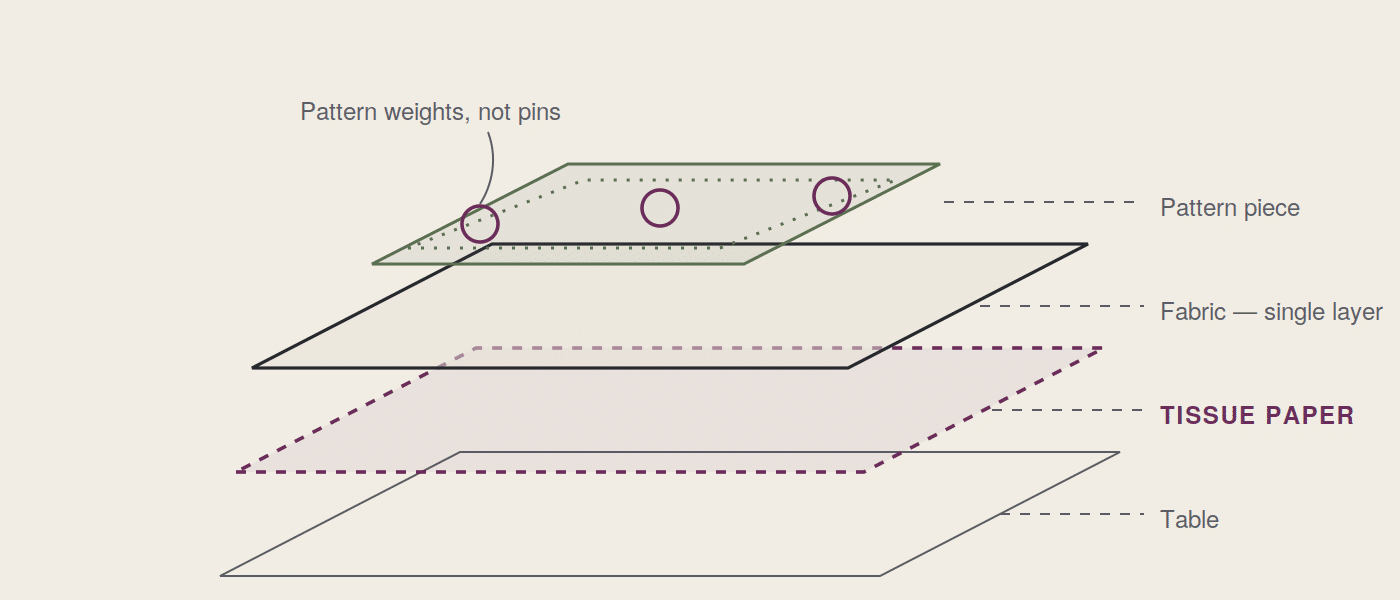
FIGURE 2 — A STABLE CUTTING SETUP
From bottom to top: tissue paper, one layer of fabric and the pattern piece. Weight or pin the layers, then cut through the paper and silk together.
Use sharp, delicate tools
Use a rotary cutter with a fresh blade or finely sharpened dressmaking shears. Pattern weights are the safest way to hold the pieces. If pins are necessary, choose extra-fine sharp pins and place them inside the seam allowance. Test clips first: their pressure can mark some delicate silks.
For very slippery fabricA temporary fabric stabiliser or a very light application of starch can add body. Test the entire process—including removal—on a scrap first, because some silks develop rings or a change in sheen.
▼ Step 3
Set up the machine for the fabric
There is no universal setting for every silk. Use these values as a starting point, then test on two layers of the actual fabric.
| Item | Starting point |
|---|---|
| Needle | A new Microtex/Sharp needle, size 60/8 or 70/10. Use the smallest size that forms a reliable stitch. |
| Thread | Fine, smooth, good-quality polyester thread. Test speciality silk thread before committing to it. |
| Stitch length | Begin around 1.8–2.2 mm. Adjust if the seam draws up or the fabric is damaged by too many perforations. |
| Needle plate | Use a straight-stitch plate with a small opening if your machine has one. |
| Presser foot | Start with the standard foot and reduce its pressure if possible. A walking or roller foot can help, but test that it does not mark the surface. |
Sew a complete test seam, press it and let it cool before judging the result. If it puckers, change one variable at a time: needle, tension, stitch length or presser-foot pressure.
The paper-under-the-seam technique
If the feed dogs pull the fabric into the needle plate or the layers refuse to travel evenly, place a strip of tissue paper or lightweight tear-away stabiliser underneath. The feed dogs grip the paper, while the paper supports the silk.
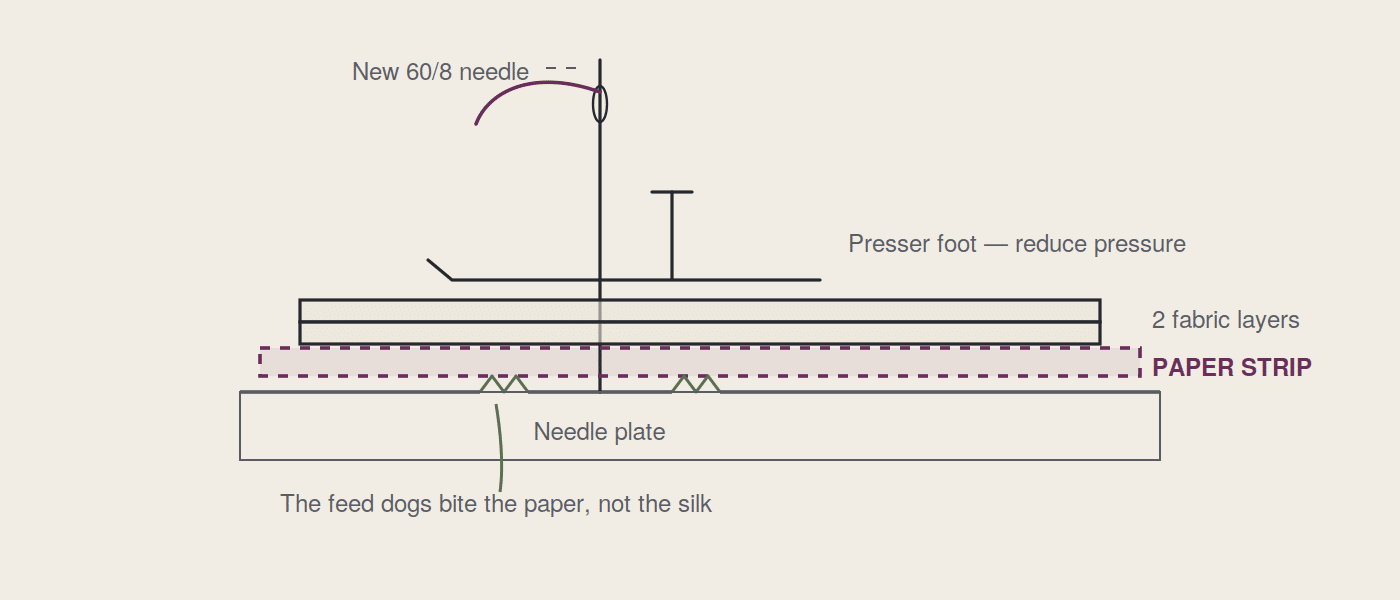
FIGURE 3 — PAPER UNDER THE SEAM
A strip approximately 4 cm wide is usually enough. It sits beneath both fabric layers and is stitched with them.
- Place the paper strip on the machine bed and lay both fabric layers over it.
- Sew through all three layers without pulling the fabric.
- After stitching, support the seam with one hand and gently tear away one side of the paper, then the other.
- Remove small pieces with tweezers rather than tugging at the stitches.
RememberPaper dulls a needle more quickly. Fit another new needle when the project is finished or as soon as the stitch quality changes.
▼ Step 4
Mark without leaving evidence
A mark that disappears from cotton may remain visible on silk. Test every chalk and pen on a scrap, including the removal method.
- Tailor’s tacks in fine thread are the safest choice for darts and matching points.
- Tailor’s chalk or a fine chalk pencil can work on the wrong side when used lightly.
- Mark notches outwards instead of cutting into a seam allowance that may fray.
- Avoid tracing wheels unless a scrap test confirms that they leave no permanent perforation or shine.
▼ Step 5
Finish seams before they fray
Lightweight silk can fray quickly. The most elegant finish for straight or gently curved seams is often a French seam, which encloses the raw edge completely.
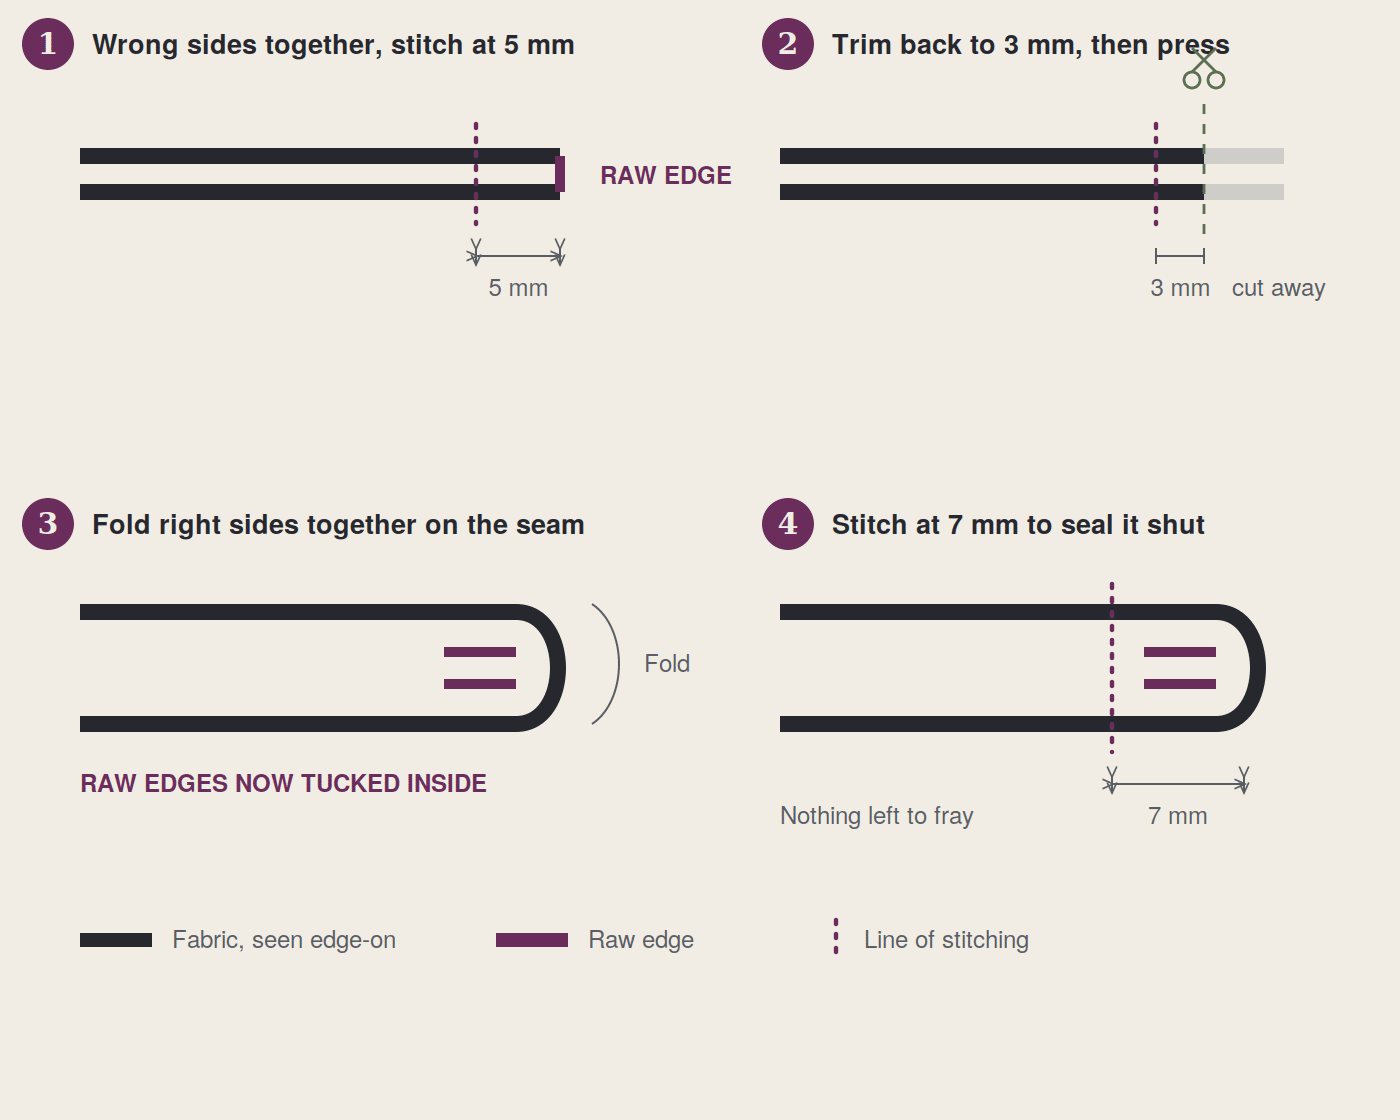
FIGURE 4 — A FRENCH SEAM, STEP BY STEP
Use this finish on straight and gently curved seams. For tight curves and strongly shaped princess seams, choose a different finish that can lie flat.
Other useful finishes include:
- Lightweight bias binding for curved seam allowances that need a clean enclosed edge.
- A fine overlocked edge with the differential feed adjusted on a test piece—especially useful for noil, dupioni and more stable silks.
- A narrow zigzag when other options would add too much bulk.
For a fine blouse or dress, a narrow rolled hem gives a light professional finish. If the garment is cut on the bias, let it hang for at least 24 hours before levelling and hemming it; the fabric may lengthen unevenly as it settles.
Two options for fluid silkThe LIMA Blouse is an easy option for crepe de chine or silk twill, with soft shaping and a peplum that shows the fabric’s movement. For a more detailed project, the AGATHE Blouse works beautifully in silk crepe, habotai or crepe de chine; its gathered neckline and sleeves make the most of a light, fluid fabric.
▼ Step 6
Press carefully—and always test first
Good pressing makes a garment look precise, but too much heat, pressure or moisture can permanently change silk.
- Begin with a low temperature and increase it only if the scrap test allows.
- Use a clean press cloth or press from the wrong side.
- Test steam before using it. Some silks tolerate it; others water-spot or lose their finish.
- Lift and lower the iron instead of sliding it, especially on bias-cut pieces.
- Press each seam as you sew and let it cool before moving the piece.
Interfacing without changing the drape
Silk organza is a traditional sew-in interfacing for collars, yokes and plackets because it adds support with little bulk. Test or pre-treat it with the fashion fabric. Very fine fusible interfacings can also work, but only after a complete sample confirms that the glue, heat and added body do not show on the right side.
▼ Troubleshooting
Five common silk problems
| What is happening | What to try |
|---|---|
| The seam puckers | Fit a new fine needle, reduce the presser-foot pressure and test the upper tension and stitch length one change at a time. |
| The machine eats the fabric | Use a straight-stitch plate, begin slightly in from the edge and place tissue paper underneath as shown in figure 3. |
| Stitches are skipped | Replace the needle first. Check that its type and size suit the fabric, then rethread the machine. |
| Pins leave marks | Use weights for cutting and extra-fine pins only inside the seam allowance. Test clips before using them. |
| The neckline stretches | Staystitch it immediately after cutting, or stabilise it with silk-organza selvedge, straight-grain organza or suitable stay tape. |
▼ Your first project
A realistic route into sewing silk
- Choose a pattern with few pieces and uncomplicated closures. The BALI Camisole is a practical place to begin.
- Make a trial version in a less expensive fabric with similar drape, such as viscose or lightweight polyester crepe.
- Buy extra silk for testing and check the pattern layout before deciding how much you need.
- Test washing, marking, stitching and pressing on scraps from the actual fabric.
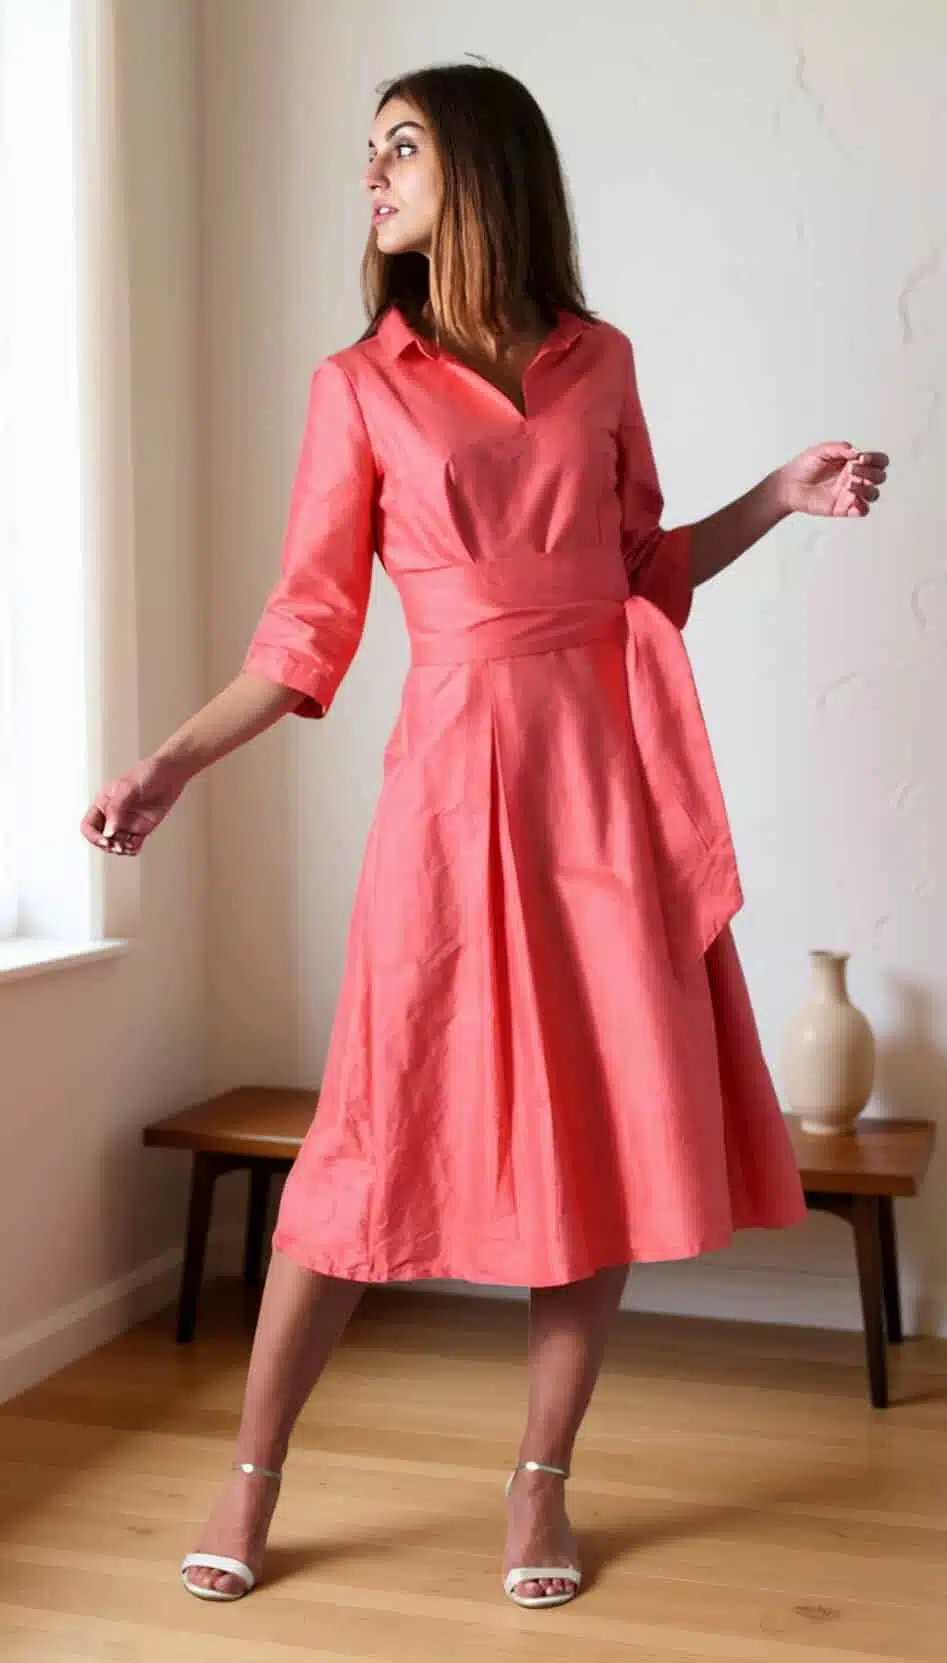
- For a fluid silk, move next to the LIMA or AGATHE blouse. For a more stable silk such as noil, twill or heavy crepe, choose a structured design such as the ASTUR Dress.
The first silk project feels slow because every stage is new. The next one is easier. The goal is not to force the fabric to behave like cotton, but to give it enough support to do what silk does beautifully: move.
Choose a pattern for your silk
Choose the pattern according to the weight and movement of your fabric.