


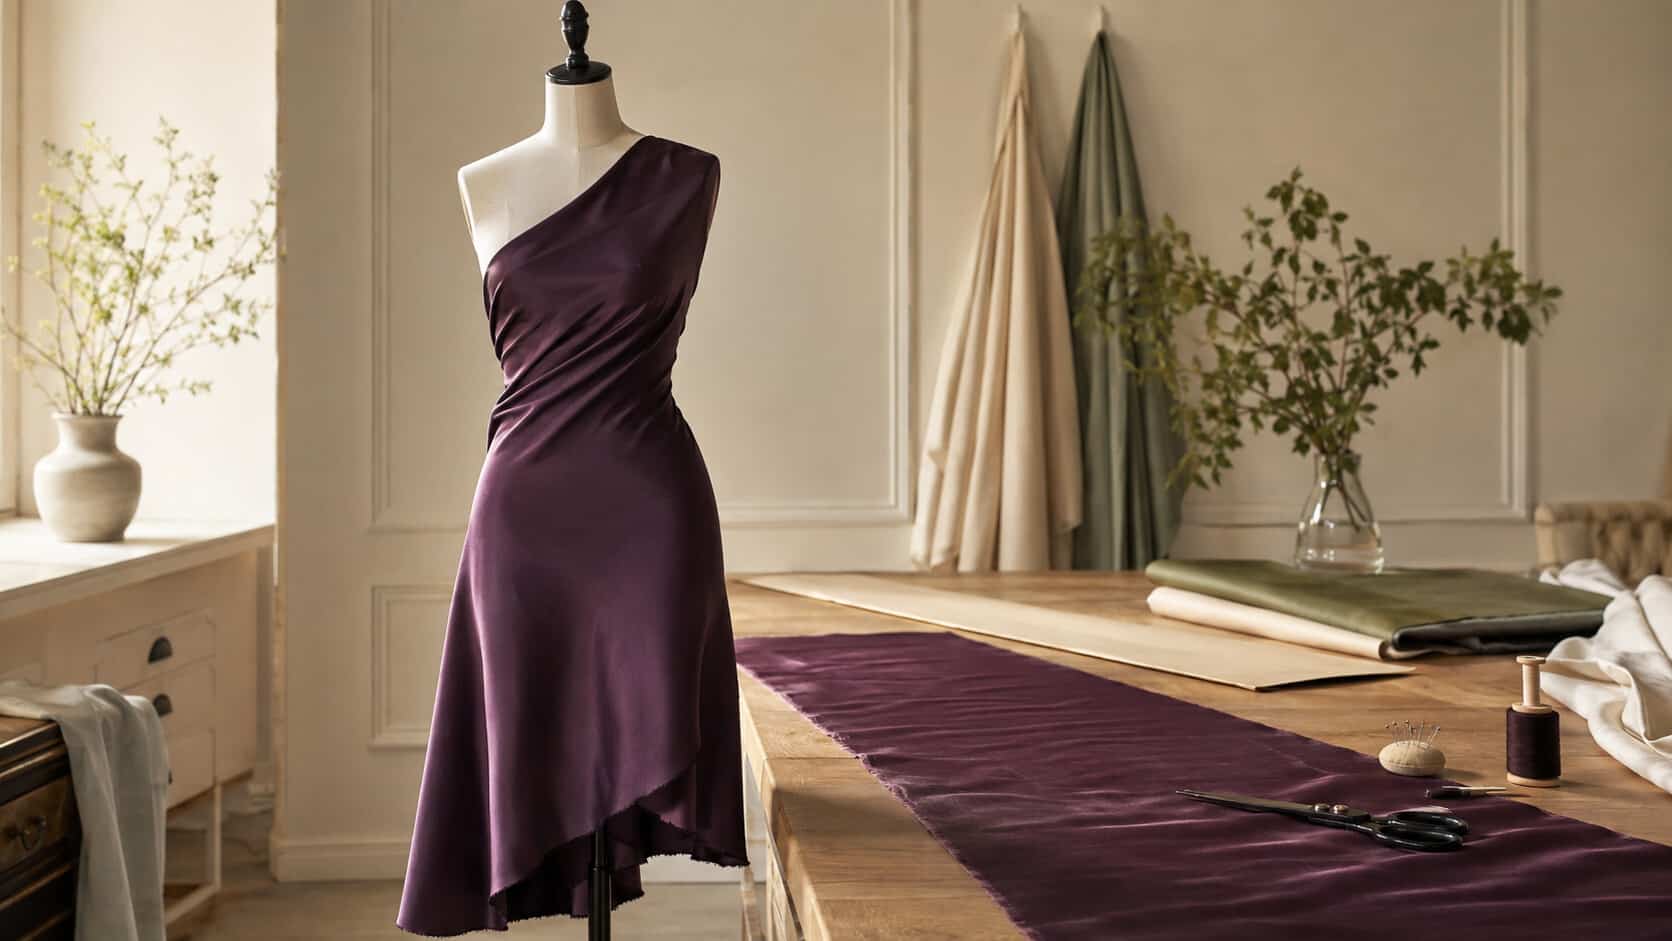
How to cut and sew on the bias
Cutting technique · Practical guide
How to cut and sew on the bias without twisted seams or an uneven hem
Bias-cut garments have a softness that straight-grain fabric cannot quite imitate: a skirt that skims, a top that moulds gently to the body, a neckline that falls into a fluid drape. That effect begins with turning woven fabric 45 degrees—and with a pattern and construction method designed around what happens next.
Bias fabric can stretch, grow and shift while you handle it. It can also twist when the two bias directions are not balanced. The aim is not to stop that movement completely, but to control it where the garment needs stability and allow it where the design needs drape.
▼ The principle
What the bias actually is
In woven fabric, the warp threads run lengthwise, parallel to the selvage, and the weft threads run across them. Those two directions are comparatively stable, although the crossgrain usually has a little more give than the lengthwise grain. Pull diagonally and the weave can shear: the angles between the threads change and the fabric becomes longer and narrower.
True bias lies at 45 degrees to both warp and weft. It usually has the greatest mechanical give, but it is not the only diagonal that moves. Other off-grain angles also have some give, and the exact response depends on the fibre, weave, finish and balance between warp and weft.
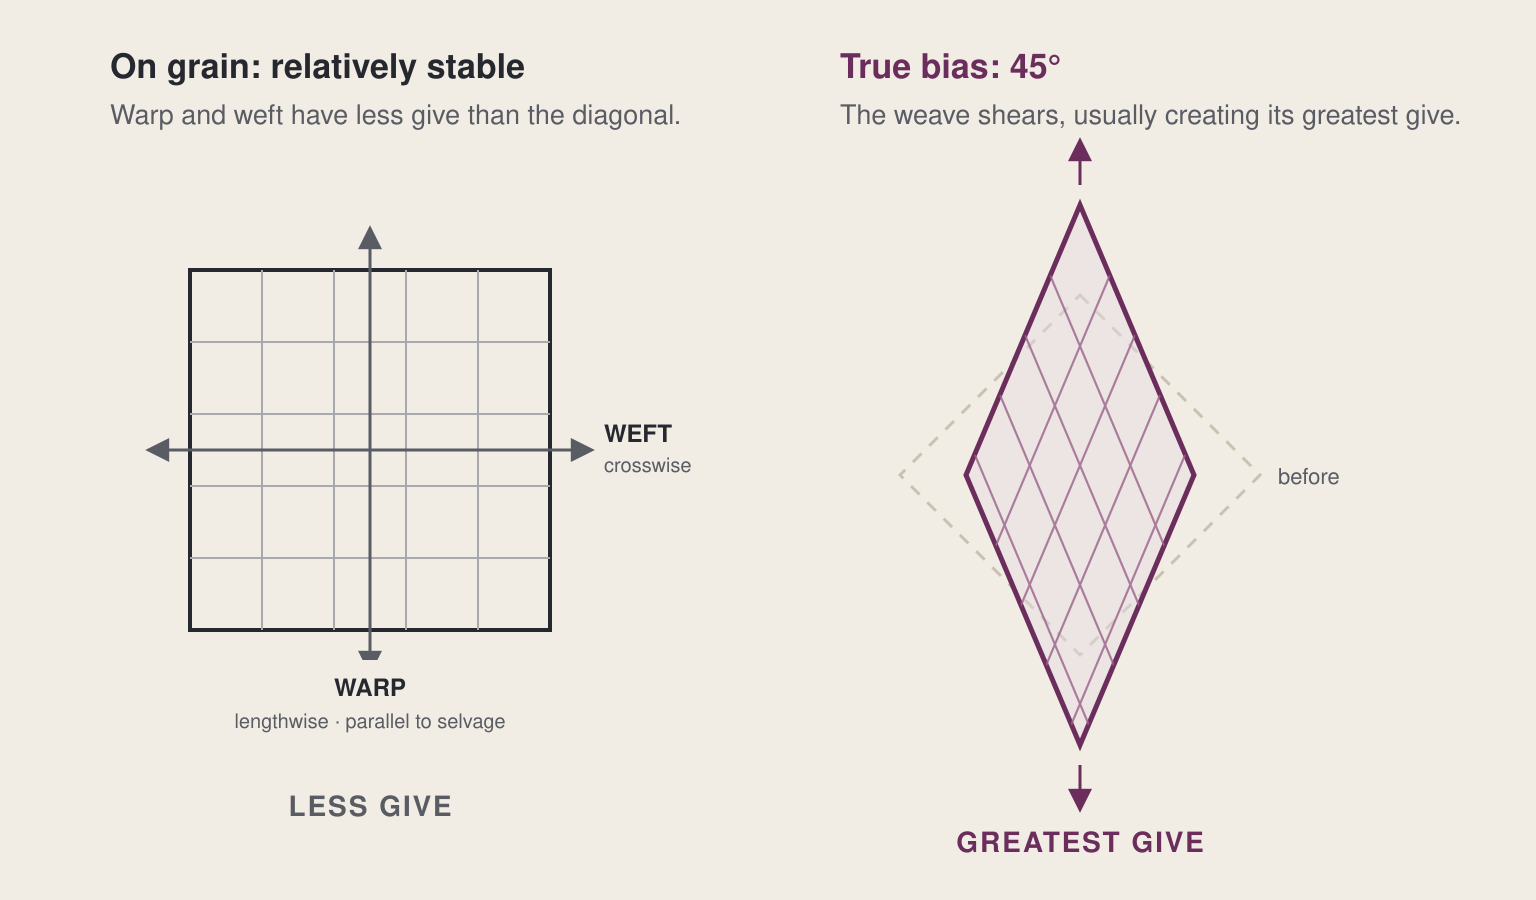
FIGURE 1 — WHY TRUE BIAS GIVES
Most of the movement comes from the weave changing angle. The yarns themselves may also straighten, compress or stretch slightly.
Two useful consequences follow:
- Accuracy matters. A piece intended for true bias should be placed at the angle marked by the pattern. Small differences can make panels hang or reflect light differently, especially in satin.
- Bias is mechanically stretchy, not elastic. Some fabrics recover well; others keep part of the distortion. Test a swatch before committing to fit, stitch or hem choices.
Why it is worth the trouble
- It moulds softly around curves. A well-drafted bias pattern can achieve shaping with fewer darts or seams.
- It moves fluidly. The fabric can respond to the body instead of holding a rigid outline.
- Some designs can be pull-on. Whether a fastening is required still depends on the pattern, fabric and intended fit.
- Bias strips follow curves. That is why bias binding can wrap around necklines and armholes without forming hard folds.
▼ Step 1
Prepare and square the fabric
Pre-treat the fabric as the finished garment will be cleaned, then let it rest flat. Before cutting:
- Find the crossgrain. Pull a single weft thread and cut along the gap. Tearing can work for robust plain weaves, but test first: it can distort or mark delicate fabric.
- Check the grain. Align the selvages without forcing them. The squared crossgrain edge should sit at a right angle to the selvages.
- Block gently if needed. Some washable fabrics can be eased back into square with diagonal tension and steam. Work gradually and let the fabric cool flat.
Worth knowingIf the fabric repeatedly returns to a pronounced skew, or straightening damages the surface, choose another fabric. Some mill distortion can be improved; permanent distortion cannot reliably be pressed away.
▼ Step 2
Find true bias
Lay the fabric flat with one selvage straight. Bring the squared crossgrain edge to meet the selvage. The resulting diagonal crease is true bias. Mark it lightly with chalk or use it as a reference line.
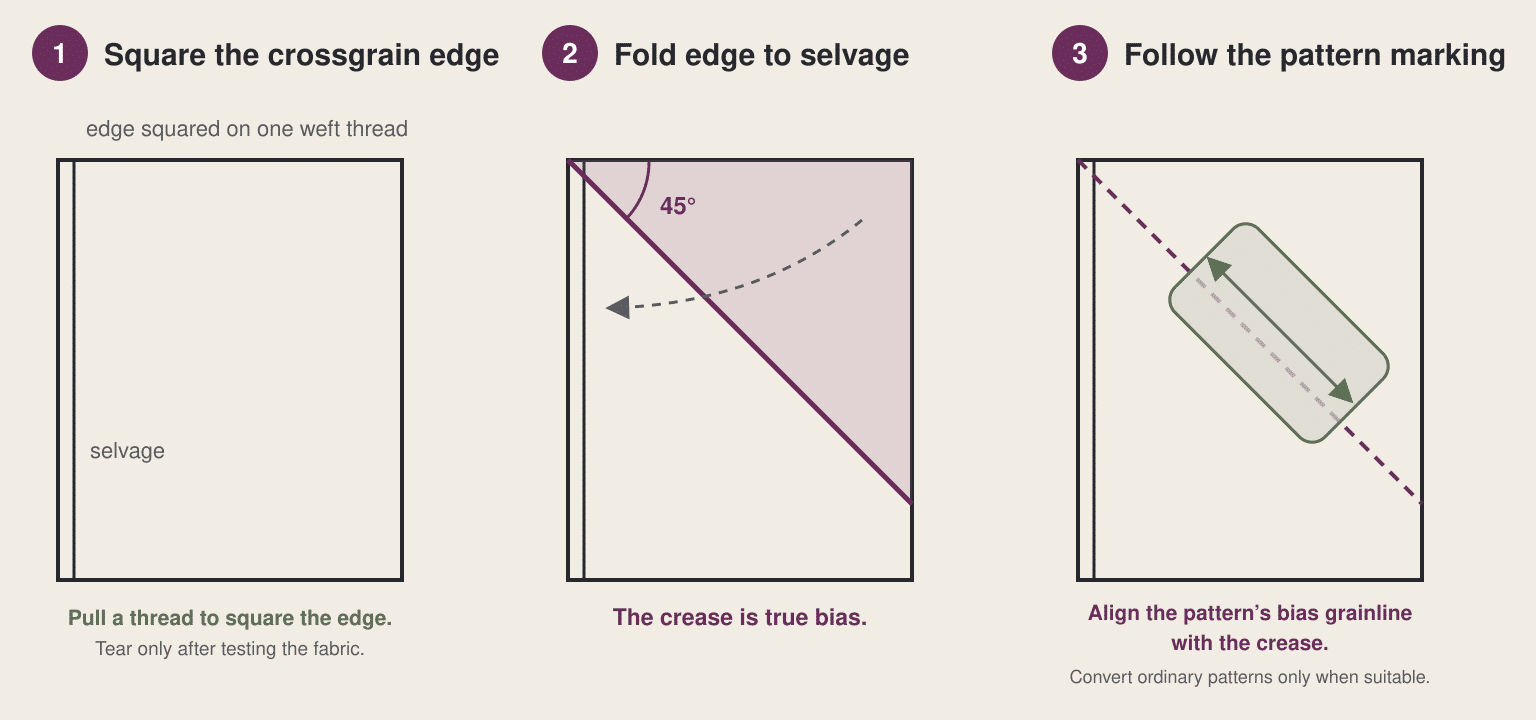
FIGURE 2 — FINDING TRUE BIAS
Use the bias grainline supplied on the pattern. Rotating an ordinary straight-grain pattern is not automatically a safe conversion.
Measure from both ends of the pattern grainline to the reference line before pinning or weighting the piece. The two measurements should match.
▼ Step 3
Plan the layout
Bias layouts usually require more fabric because the pieces sit diagonally and do not nest as tightly. There is no dependable universal percentage: the extra amount changes with fabric width, garment size, piece shape, nap and print repeat. Use the pattern’s bias yardage and test the complete layout before buying whenever possible.
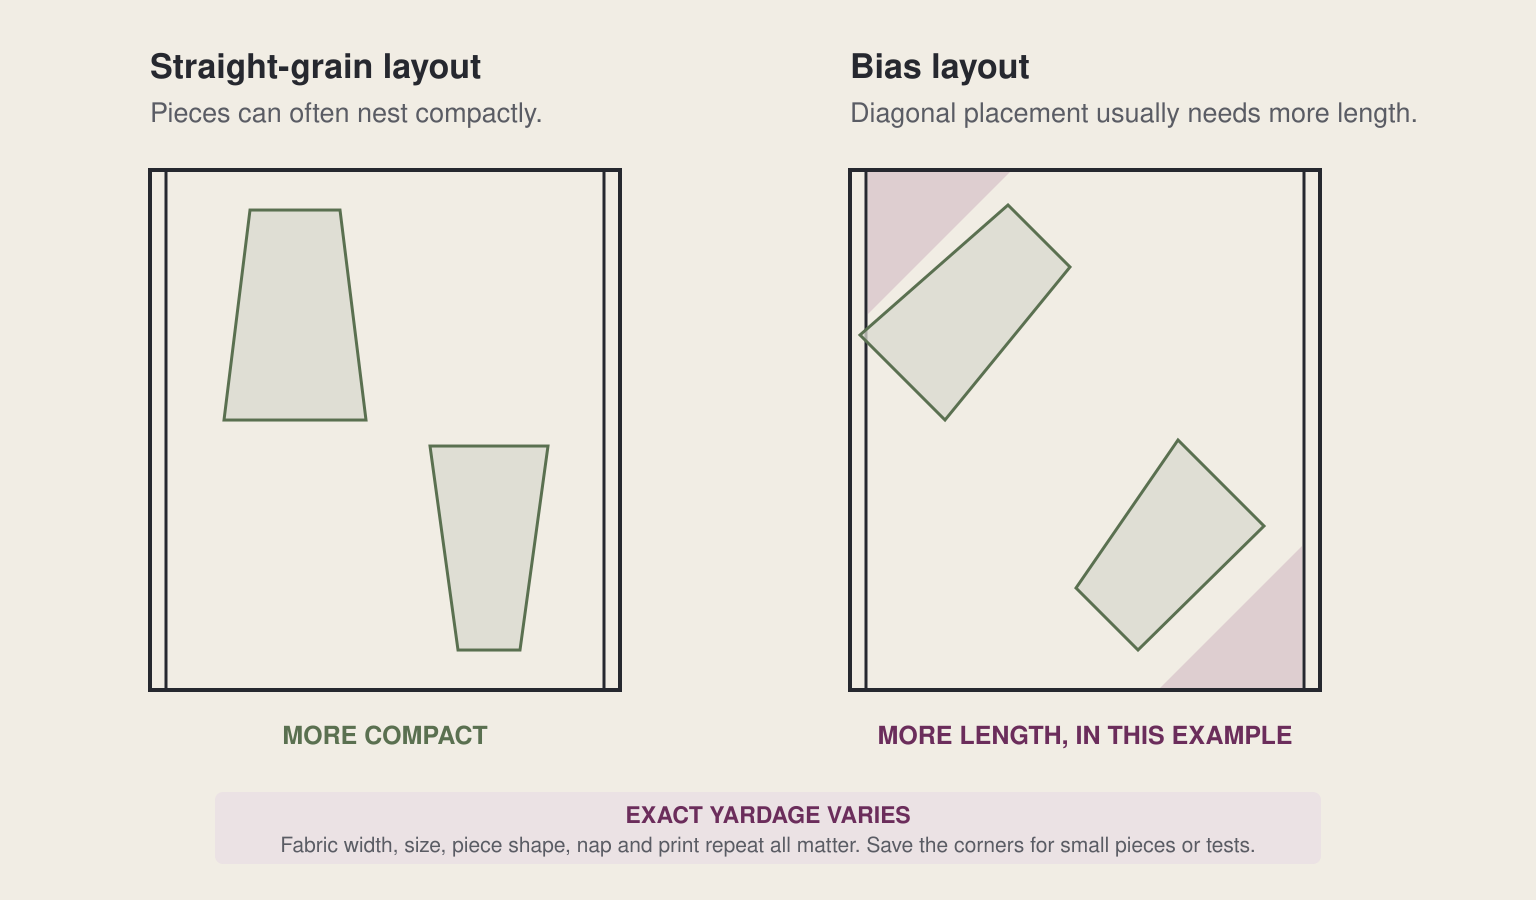
FIGURE 3 — AN ILLUSTRATIVE LAYOUT
The shaded corners are unavailable for these large panels, but they may still provide bindings, facings, pockets or useful test scraps.
Single layer is the safest method
Cutting one layer at a time gives the best control and avoids the lower layer shifting. Make full pattern pieces and flip them where a mirror image is required. A stable fabric may sometimes be cut doubled when the pattern specifically provides that layout, but single-layer cutting remains the reliable choice.
Nap direction and bias balance are different
Keep a one-way print, pile or satin surface running consistently from top to bottom. Separately, balance the two true-bias directions. Front and back pieces—or successive panels around the body—are commonly placed on opposing biases to reduce twisting. The exact arrangement depends on the design, so follow the supplied cutting layout.
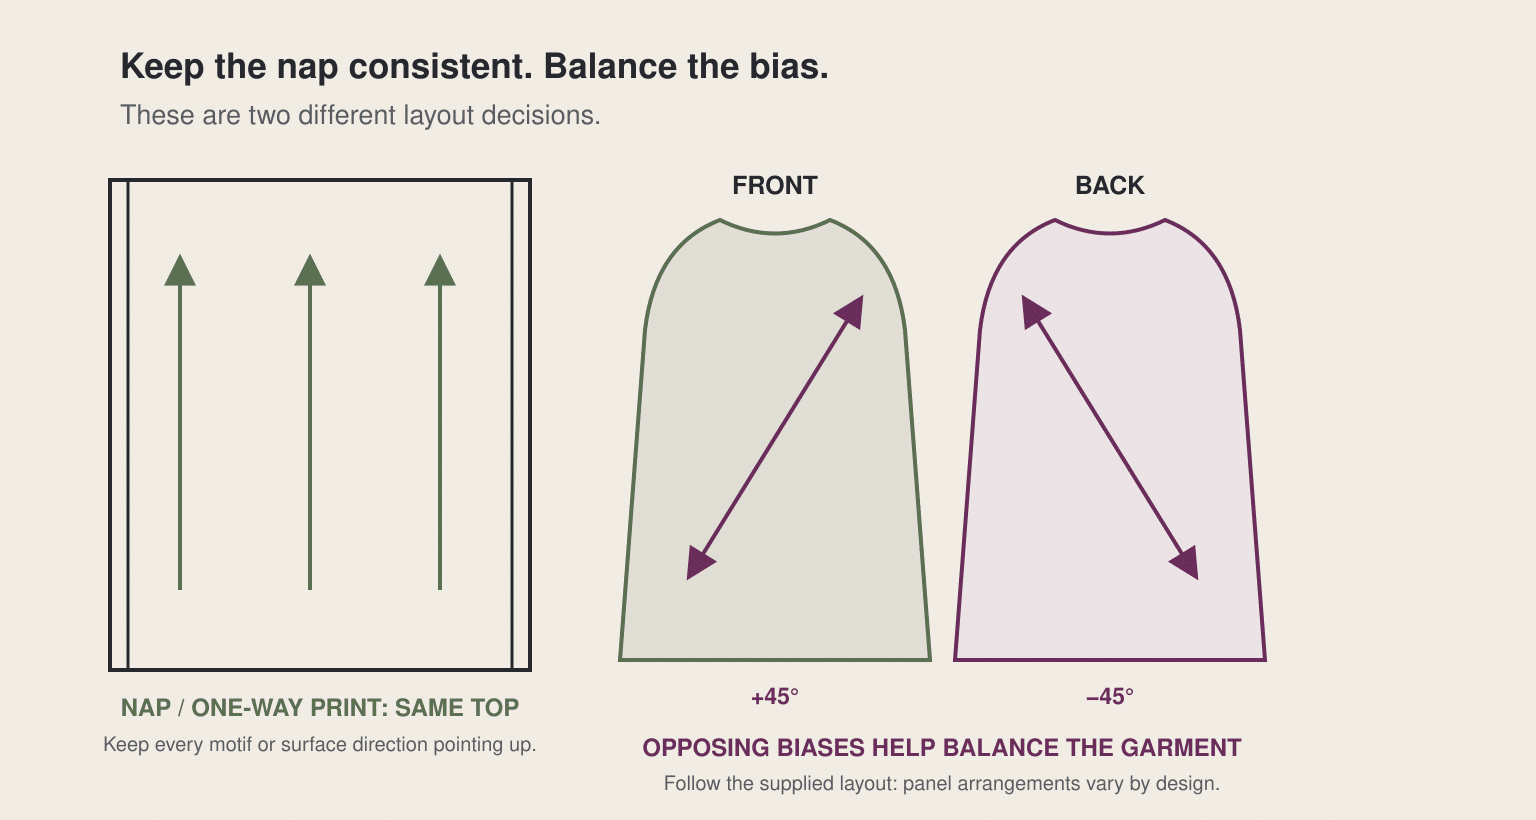
FIGURE 4 — BALANCING THE GARMENT
Parallel bias directions around the body can encourage the garment to rotate. Opposing directions distribute the pull more evenly.
While cuttingSupport every part of the fabric on the table. Use sharp shears or a rotary cutter, and add tissue paper underneath a slippery fabric. Mark notches, balance points, seamlines and the top of each piece before lifting the pattern.
▼ Step 4
Sew without distorting the seams
Bias sewing is fabric-specific. Make a seam sample first, let it hang, then press it before choosing the stitch and machine settings.
- Handle lightly. Support the garment and let the machine feed it. Do not pull unintentionally from the front or back.
- Test the stitch. A narrow zigzag can give a vertical bias seam room to move; a straight stitch may suit a more stable fabric. Avoid very short stitches that pucker or perforate a delicate cloth.
- Control the layers. Fine pins, hand-basting or a walking foot may help. Test the walking foot because it is not ideal for every fine fabric.
- Stabilize selectively. Staystitch necklines and armholes promptly. Use straight-grain stay tape, selvage, silk organza or an appropriate reinforced fusible stay tape where growth must be controlled. Ordinary bias binding is flexible and is not automatically a stabilizer.
- Press; do not iron. Lift and lower the iron instead of sliding it. Use the temperature and steam appropriate to the fibre.
- Store the work flat. Support unfinished sections between sewing sessions so they do not grow before assembly is complete.
▼ Step 5 — the important one
Let it settle before hemming
Gravity can make a bias garment grow longer and narrower, and different sections may drop by different amounts. Complete the main construction but leave the hem unfinished. Hang the garment from its intended support points for at least 24 hours, often 48, and longer if the hemline is still changing.
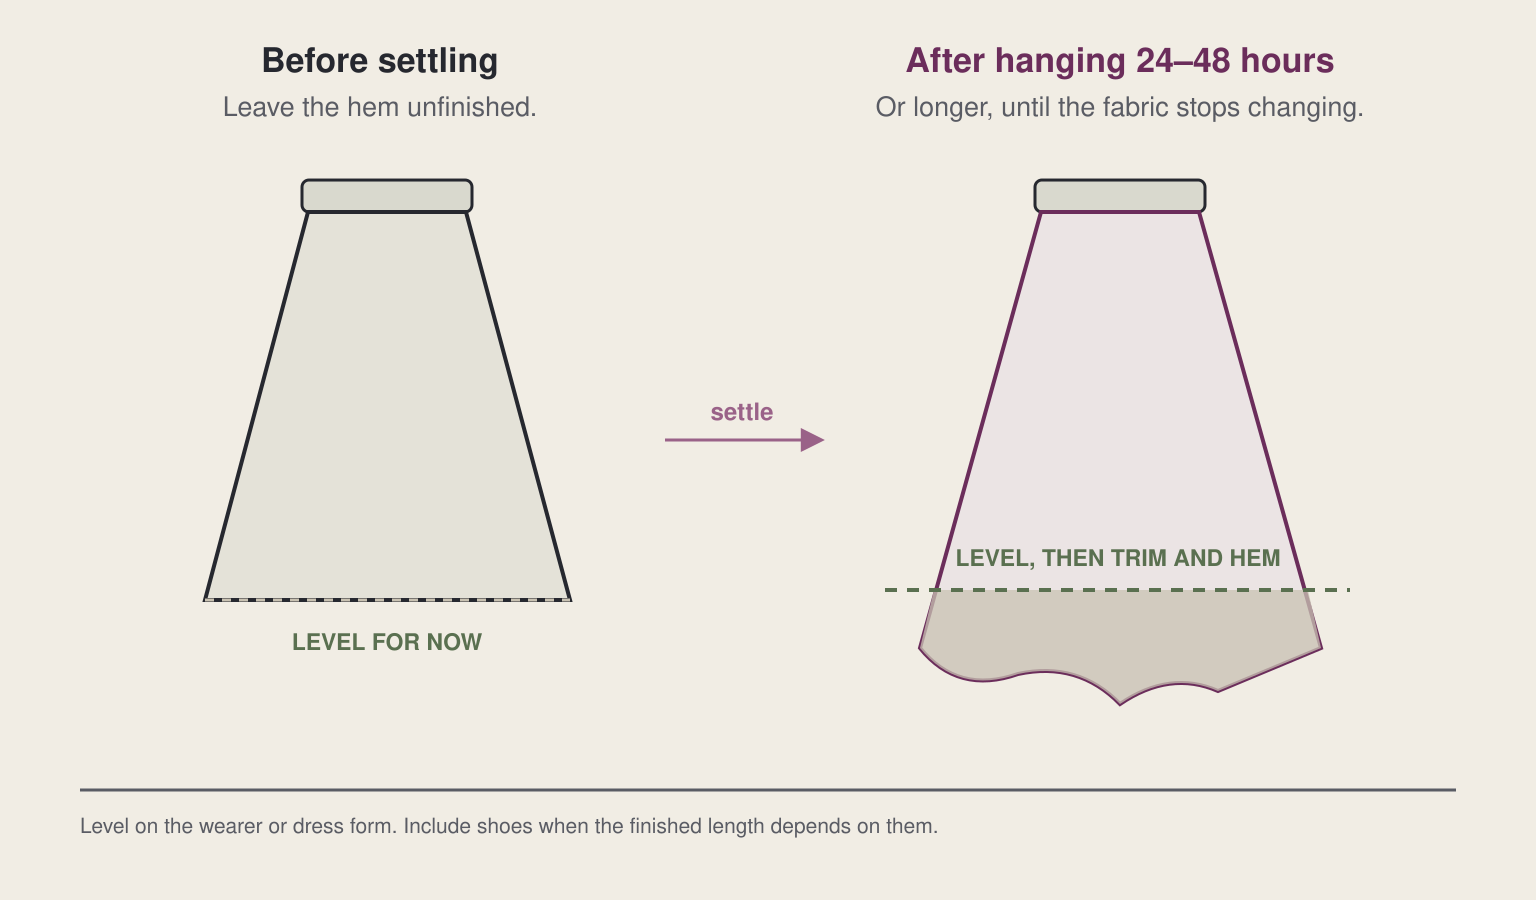
FIGURE 5 — THE DROP
The amount of change varies. The goal is not to wait a fixed number of hours, but to let the fabric settle before establishing the final hemline.
Then level the hem:
- Put the garment on the wearer or dress form exactly as it will be supported in use.
- Measure from the floor at regular intervals and mark a consistent height. Include the intended shoes when they affect a floor-length or ankle-length result.
- Join the marks smoothly, trim, and then hem.
Keep the hem compatible with the fabric
A narrow rolled or baby hem is often the least disruptive finish for a fluid skirt or dress. A deeper hem may show through or add enough weight to alter the fall. Whichever finish you choose, make another sample and avoid stretching the edge as it passes through the machine.
▼ Fitting
Bias needs different ease—not automatically less
Bias can mould closely to the body, but it also lengthens and narrows under weight. The correct ease depends on the fabric, pattern and intended silhouette. Do not assume that a woven bias garment should have zero or negative ease.
- Use the pattern’s body and finished-garment measurements. A pattern drafted for bias should account for the intended drape and movement.
- Make a full-length toile. Use a fabric with similar weight and drape; a short sample cannot reveal the effect of gravity accurately.
- Fit after settling. Evaluate the garment on the body after it has hung, then adjust through the marked stitching lines rather than relying on distorted raw edges.
Choose the fabric for your experience level
Good first choices: cotton lawn, a lightweight plain-weave linen, wool challis or a stable lightweight crepe with some “tooth.” Beautiful but more demanding: viscose/rayon challis, silk crepe de chine, charmeuse, satin, cupro and slippery lining fabrics. Usually unsuitable: stiff, heavy cloth that cannot drape. Knits do not have true bias in the same woven-grid sense; use them only when the pattern explicitly supports a stretch-fabric version.
Stripes and checks become diagonals and can form chevrons at balanced seams. That can be the central design feature, but it needs additional fabric and careful matching.
▼ When it goes wrong
Five problems to diagnose
| What’s happening | Likely causes and response |
|---|---|
| The garment rotates around the body | The panel biases may be unbalanced, the grain placement inaccurate, or the fabric strongly unbalanced. Recheck the layout before cutting; a severe cut-grain error is difficult to correct later. |
| The hem is uneven or wavy | The garment may need more settling time, or the edge may have stretched while sewing. Let it settle, re-level, and test a lighter hem method. |
| The seams ripple | Check handling, foot pressure, thread tension, stitch length and differential feeding between layers. Test the complete seam and pressing sequence on scraps before resewing. |
| The neckline grows or gapes | It may have been handled before staystitching or may need an appropriate stay. Stabilize early and support the edge throughout construction. |
| The fit changes after hanging | The fabric has lengthened and narrowed. Fit after settling, using generous seam allowances and the marked stitching lines. |
▼ Start with a pattern drafted for bias
Three Aina patterns to practise the technique
A short bias top is a manageable first project because there is less hanging weight. Once the cutting and seam handling feel familiar, a full-length dress shows the bias at its most fluid.
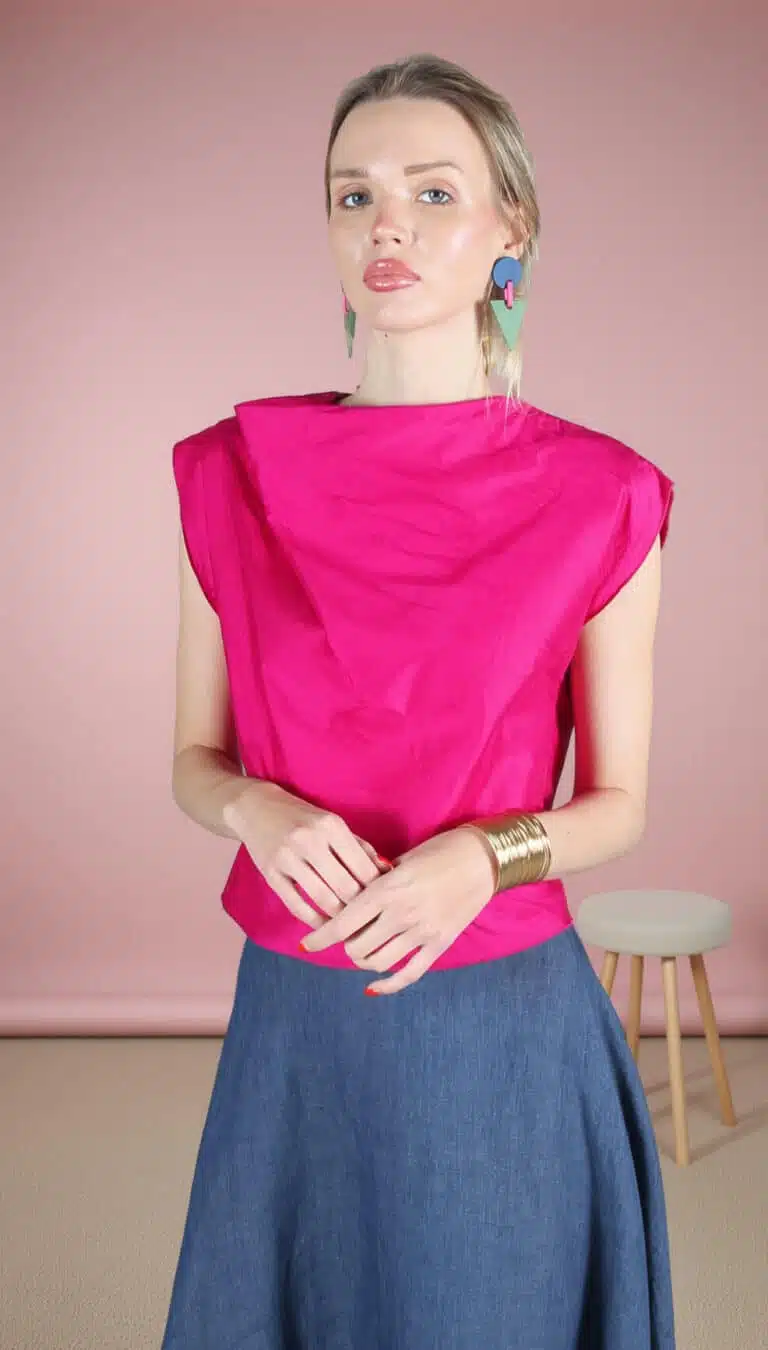 DALIA TOPA quick bias-cut draped top: very easy, about 1 hour, XS–4XL.
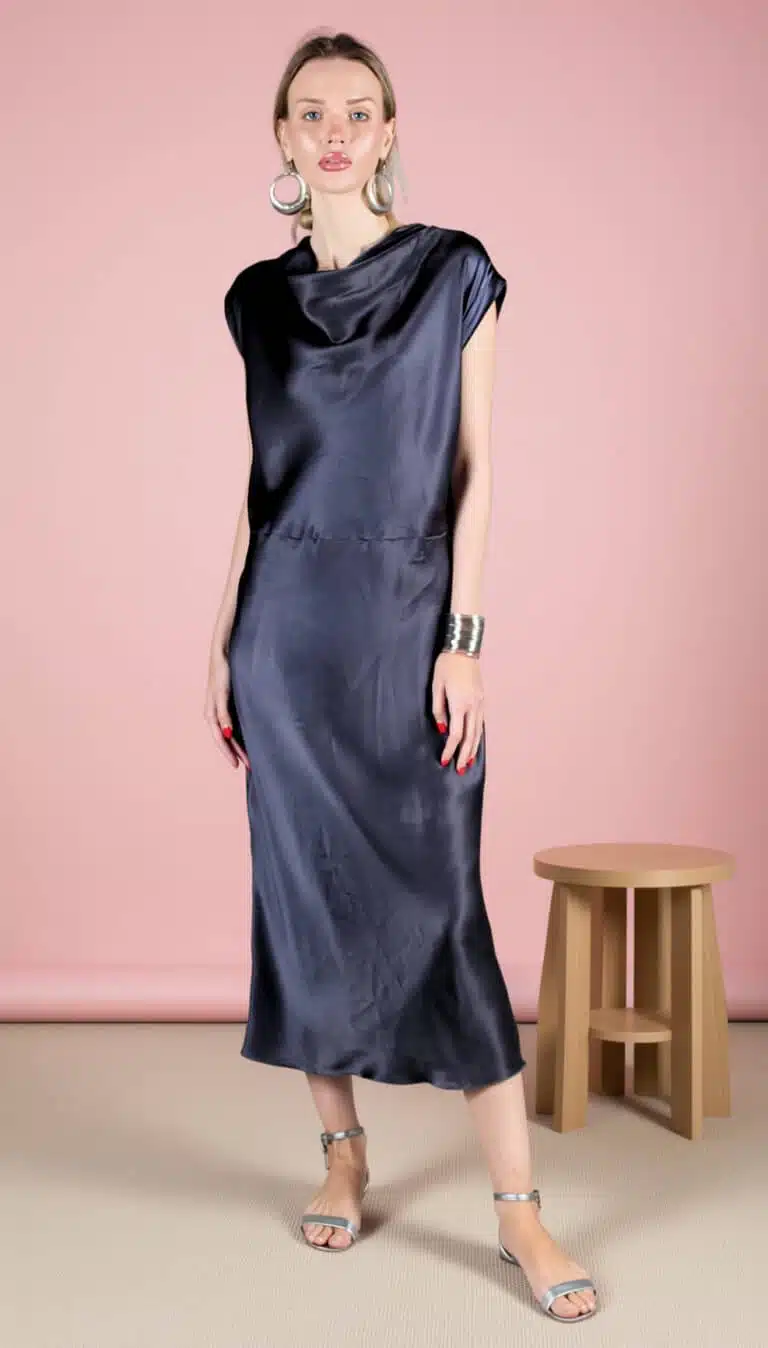 GEORGIA DRESSA fluid bias-cut dress with an elastic-waist option: easy, 1–1.5 hours, XS–4XL.
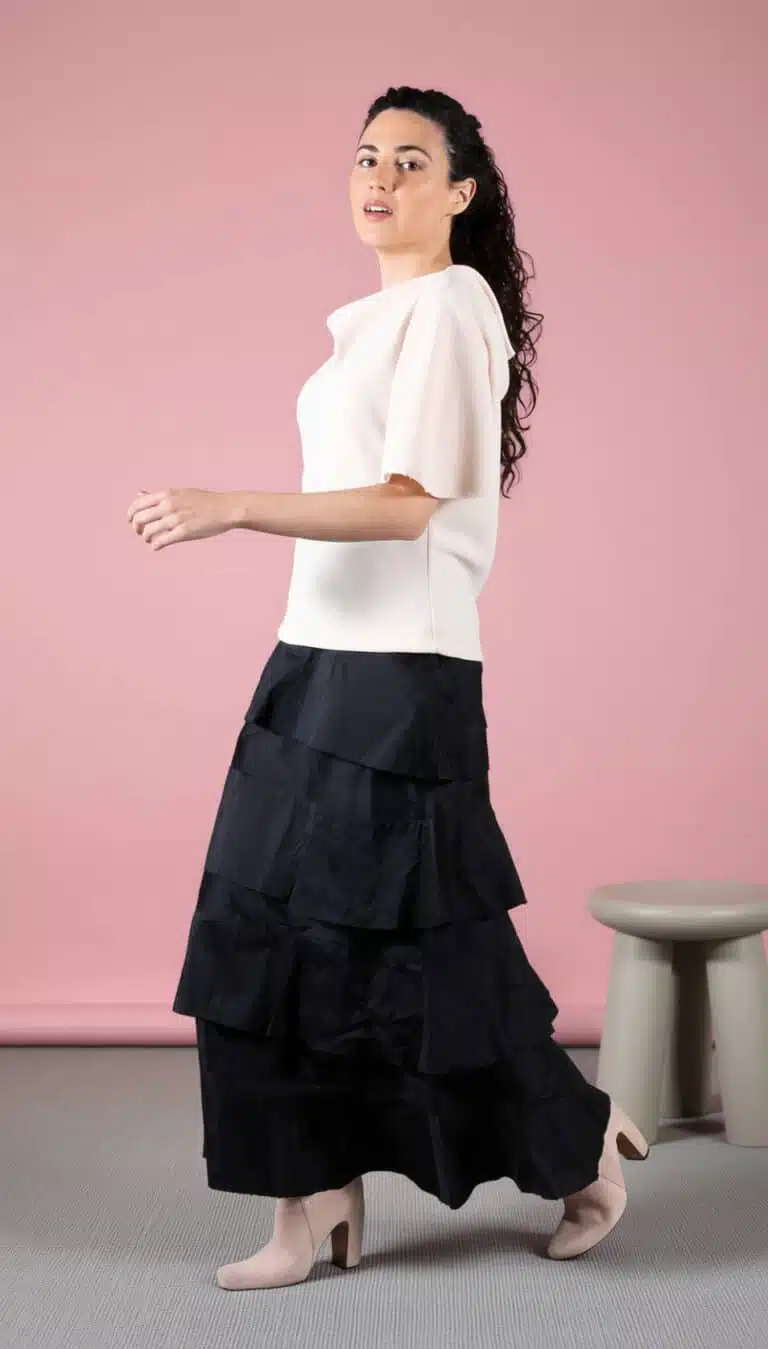 DEA BLOUSEA soft cowl-neck bias top: beginner level, about 1 hour, XS–4XL.
Let the pattern do the engineering
A purpose-drafted layout tells you which bias direction each panel needs, where to stabilize and how much fabric to allow. Follow it before applying any general rule.