


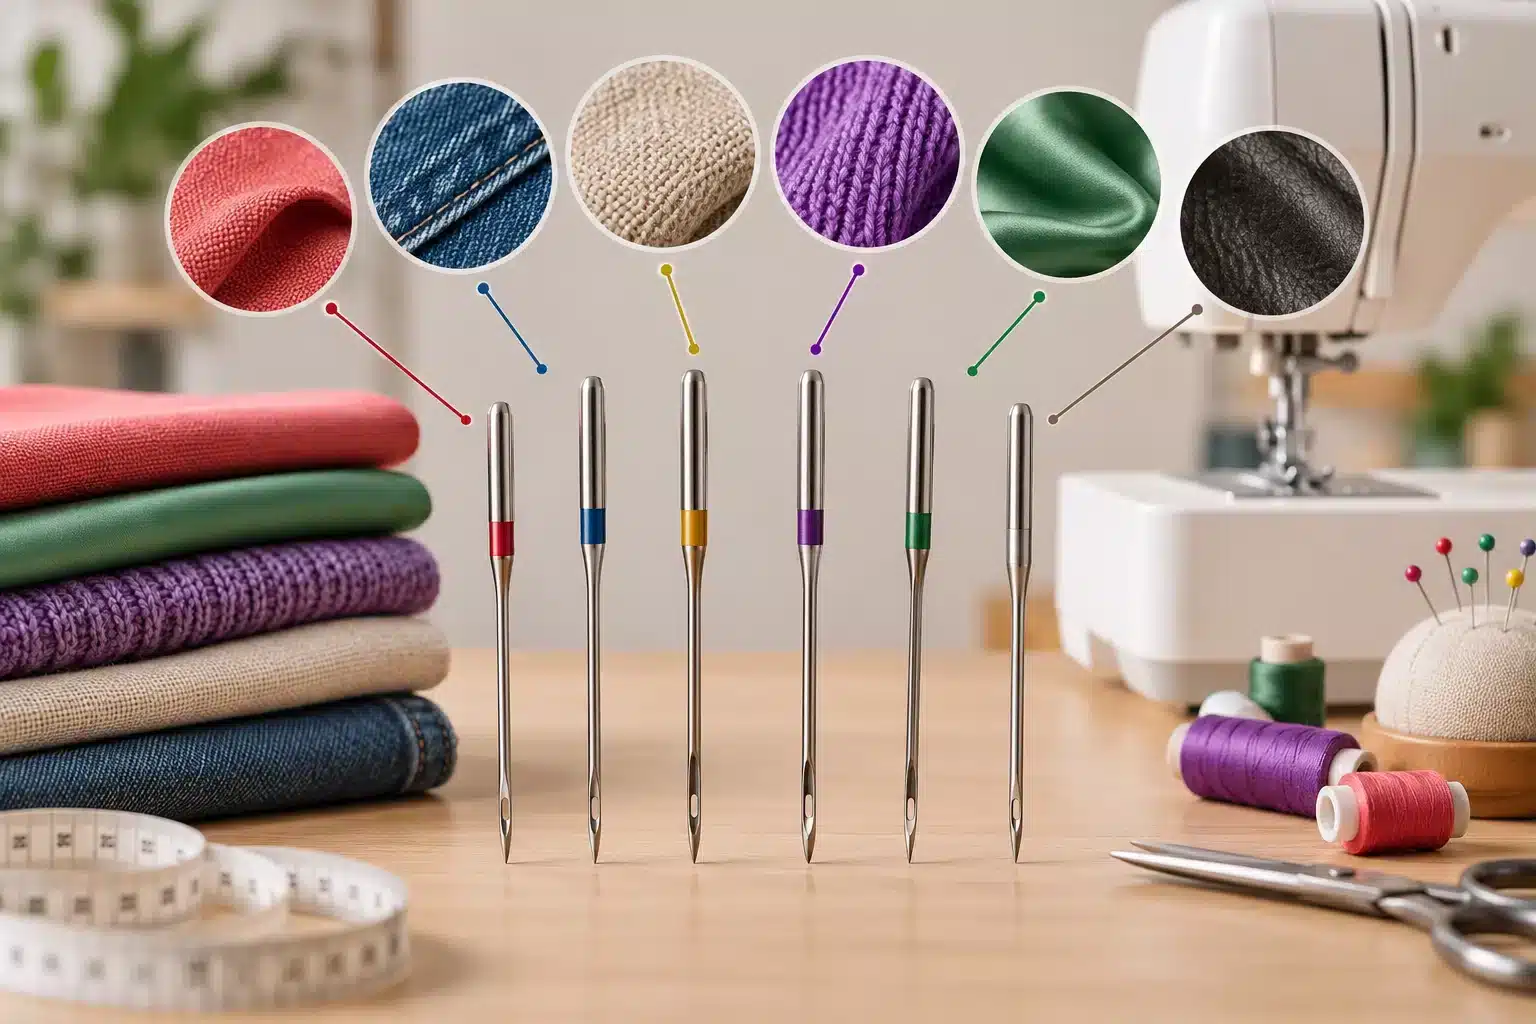
How to Choose the Right Sewing Machine Needle: Easy Guide
Have you ever finished a seam and noticed skipped stitches, puckered fabric, or tiny holes along the stitching line? Nine times out of ten, the culprit isn’t your machine or your skills — it’s the needle.
Choosing the right needle is one of the easiest ways to instantly improve your sewing results. In this guide, you’ll learn how to match the needle type and size to your fabric and project, so every seam looks clean and professional.
Why the Needle Matters More Than You Think
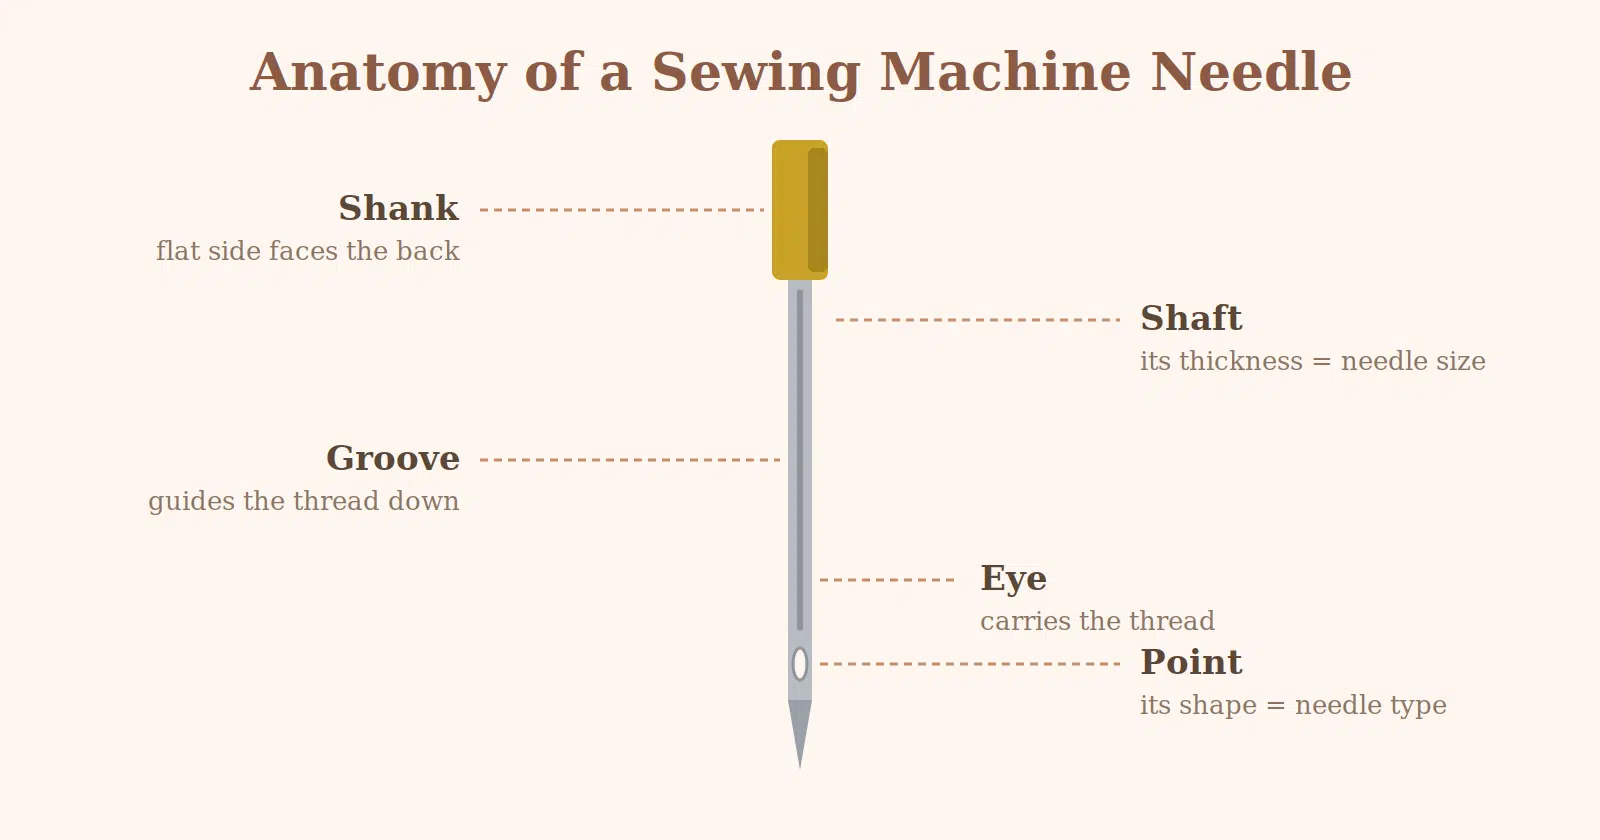
A sewing machine needle does three jobs at once: it pierces the fabric, carries the thread down to meet the bobbin, and forms the loop that creates each stitch. If the needle is too thick, too thin, or has the wrong tip shape for your fabric, the stitch quality suffers — no matter how good your machine is.
The good news? Once you understand two things — tip shape and size — choosing the right needle becomes second nature.
Needle Types Explained: Match the Tip to the Fabric
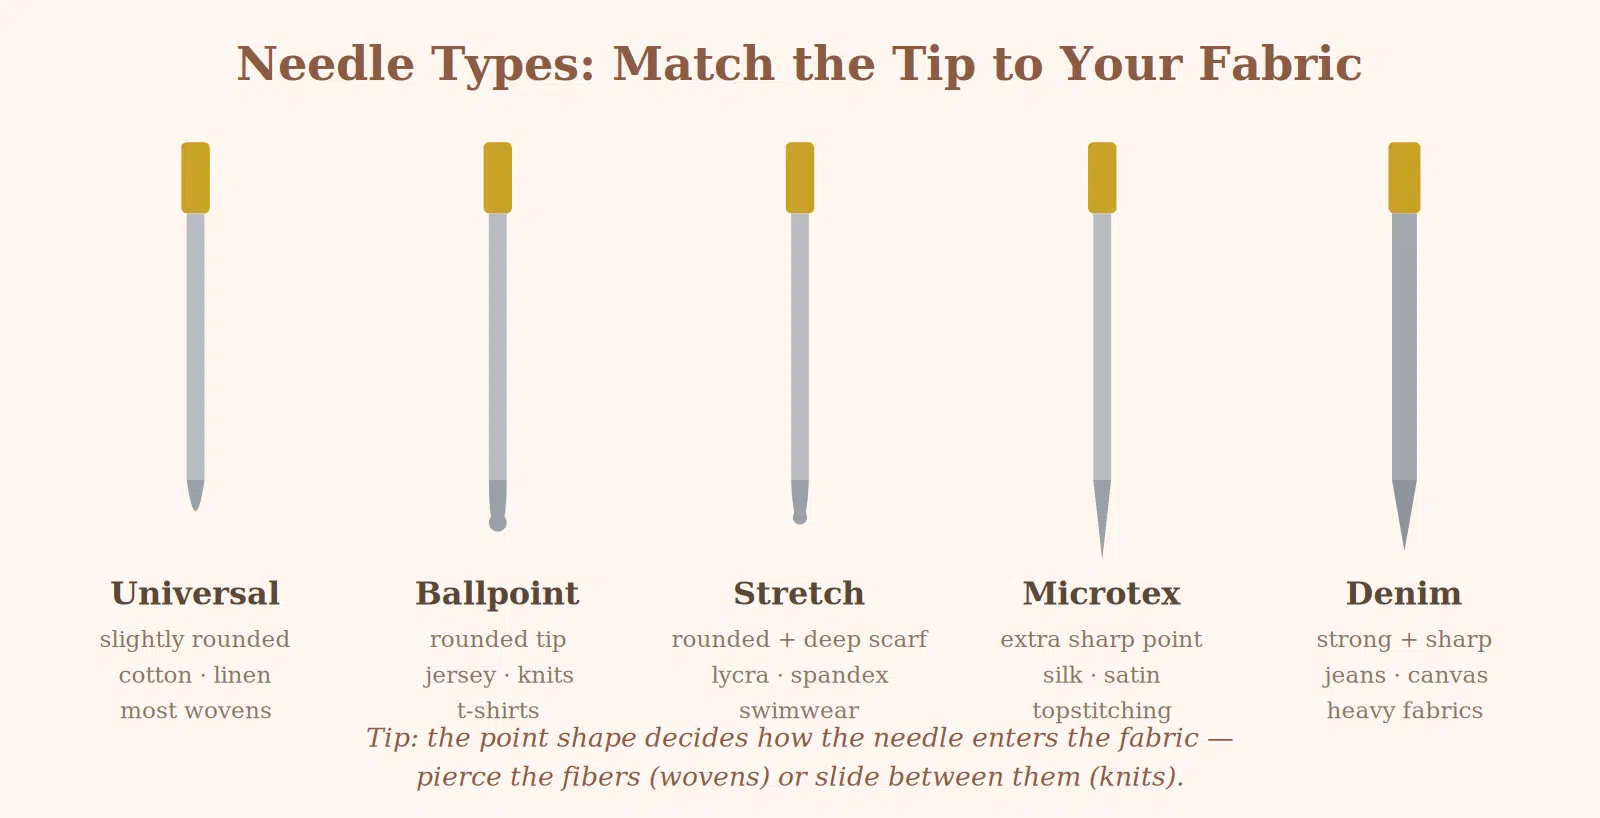
Universal needles are your everyday workhorse. They have a slightly rounded point that works on most woven fabrics like cotton, linen and polyester blends. If you’re sewing a classic woven blouse like our beginner-friendly LIMA peplum blouse, a universal needle is usually all you need.
Ballpoint (jersey) needles have a rounded tip that slides between the fibers of knit fabric instead of piercing them. Use these for t-shirts, sweatshirts and fitted knit dresses like our ERA knit dress — they prevent runs, snags and skipped stitches.
Stretch needles go one step further than ballpoint. They’re designed for very elastic fabrics with spandex or lycra: swimwear, leggings, activewear, or draped jersey garments that need at least 20% stretch — like our elegant ALICIA draped maxi dress. If your knit fabric keeps producing skipped stitches even with a ballpoint needle, switch to a stretch needle.
Microtex (sharp) needles have an extra-fine, very sharp point. They’re perfect for delicate or tightly woven fabrics: silk, satin, chiffon — think of an elegant drapey top like our DEA cowl neck blouse in satin — and also for precise topstitching where you want perfectly straight lines.
Denim (jeans) needles have a strong, thick shaft and a sharp point that punches through heavy fabrics like denim, twill and gabardine without breaking or deflecting. They’re the right choice for structured trousers like our BALLOON pants with their modern balloon silhouette, sewn in denim or cotton twill.
Leather needles have a chisel-shaped cutting point. Use them only for real leather or suede — never on woven fabric, because the cutting tip will slice the threads and weaken your seams.
Twin needles are two needles on a single shaft. They create two parallel rows of stitching at once — the classic professional hem finish you see on ready-to-wear t-shirts.
Needle Sizes: What Do the Numbers Mean?
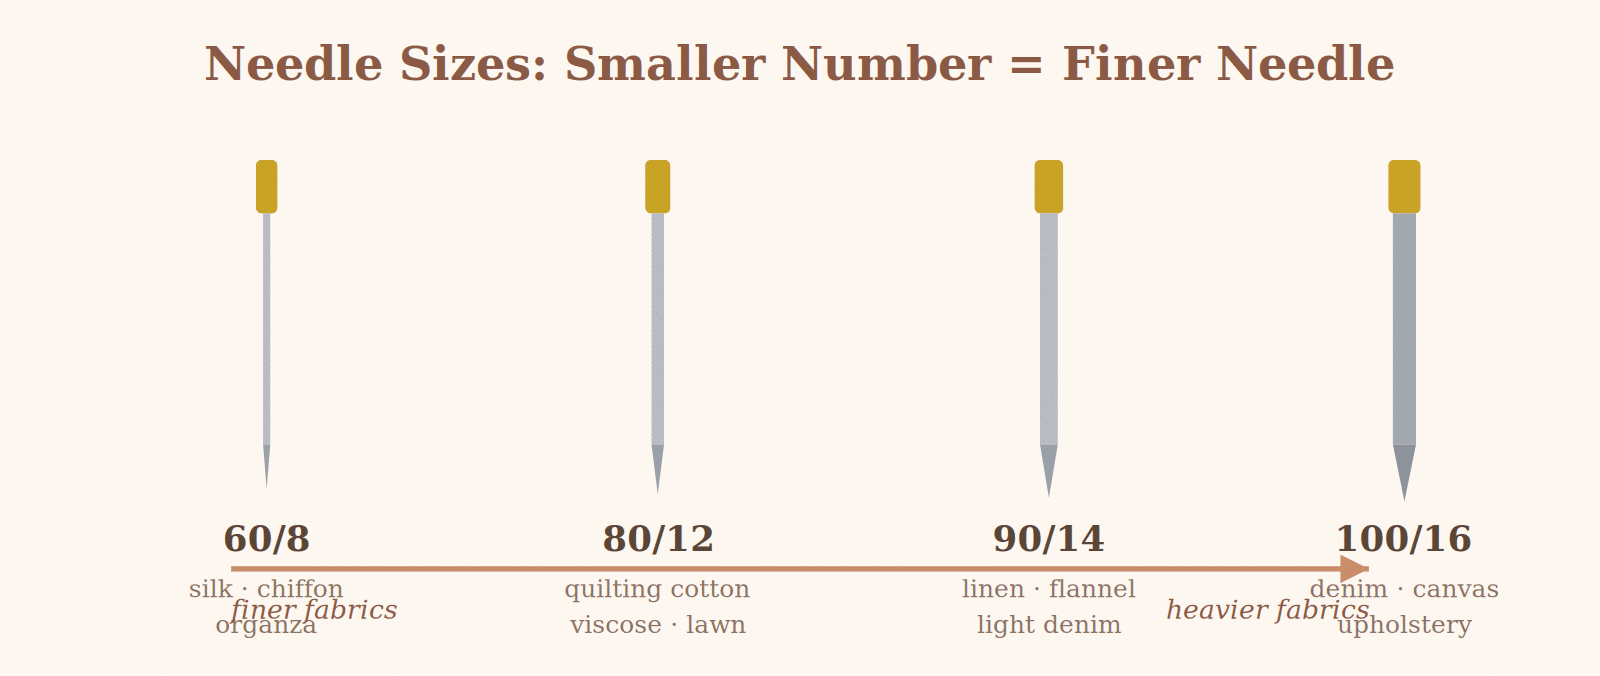
Every needle packet shows two numbers, like 80/12 or 90/14. The first is the European size, the second is the American size — they mean the same thing. The rule is simple: the smaller the number, the finer the needle.
Quick Cheat Sheet by Project
Planning your next make? Here’s what to reach for:
| Your project | Needle type | Size |
|---|---|---|
| Cotton or viscose blouse (like LIMA) | Universal | 80/12 |
| Fitted knit dress (like ERA) | Ballpoint | 80/12 |
| Draped jersey dress (like ALICIA) | Stretch | 75/11 |
| Satin or silk top (like DEA) | Microtex | 60/8 – 70/10 |
| Denim or twill pants (like Balloon) | Denim | 100/16 |
| Canvas tote bag | Denim | 100/16 |
| Knit hem finish | Twin (stretch) | 4.0/75 |
Three Golden Rules for Needles
Change your needle often. A needle is a consumable, not a lifetime tool. Replace it after every 8–10 hours of sewing, or at the start of each new project. A dull needle is the number one cause of skipped stitches and fabric damage.
When in doubt, test first. Always sew a test seam on a scrap of your actual fabric before starting your project. It takes 30 seconds and saves hours of unpicking.
Listen to your machine. A popping or punching sound while sewing means the needle is struggling — stop and switch to a sharper or thicker needle.
Ready to Put This Into Practice?
Now that you know exactly which needle to use, why not start your next project? Browse our collection of PDF sewing patterns — each one comes with step-by-step instructions and video tutorials, so you’ll always know exactly which fabric and needle to pair with it.